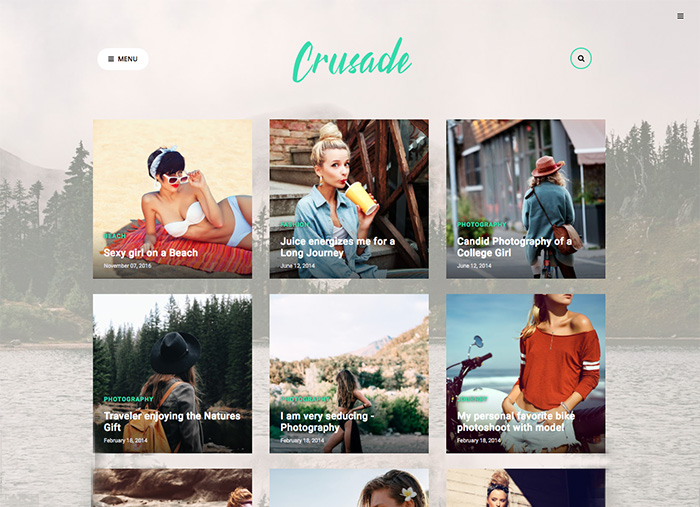
Welcome to the Documentation of Crusade Photography Blogger Template, below are the steps that will help you to configure and setup our Crusade Blogger Template.
If you are finding any difficulties configuring the template then you can go ahead and purchase our Hassle Free Template + Installation Package from here and our team will setup the template for you:
1. Installing the template
- Unzip the Crusade.zip file.
- On Blogger Dashboard Click Template.
- Click on Download Full Template to keep your old template as a backup just in case.
- Click Browse… button. Find the location of “Crusade Template.xml” select it.
- Then Click Upload.
2. Blogger Setting
After installing the theme, there are minimum settings to make all widgets work fine in this template.
- On Blogger Dashboard Click Settings.
- Click Other.
- In Site Feed > Allow Blog Feed Choose Full.
- Then Click Save settings.
3. Social Setting
This is optional setting but we would recommend it to enable these features in your blog, to make it more social friendly.
|
1
2
3
4
5
|
<meta content='<enter your username>’ name=’twitter:site’/>
<meta content='<enter your name>’ name=’twitter:creator’/> <meta content='<enter your site url>’ name=’twitter:domain’/> |
4. Main Blogger Setting
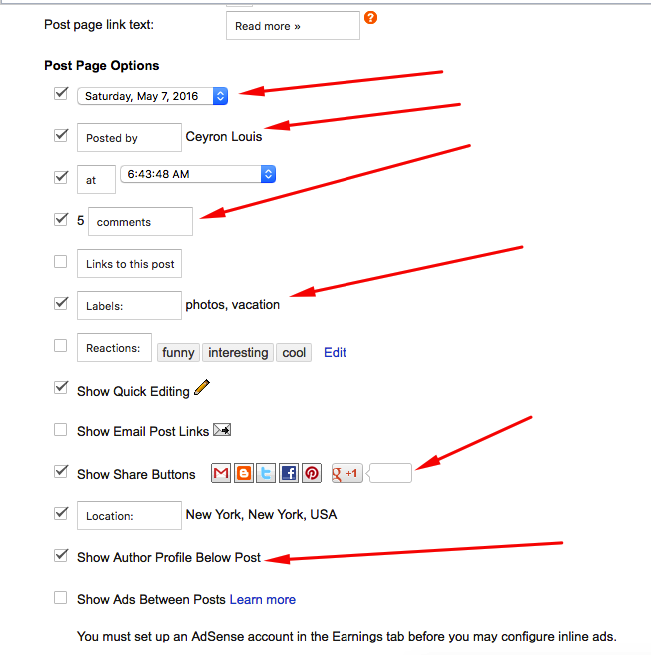
- On Blogger Dashboard Click Layout.
- Click Edit on Blog Posts Widget.
- Change it to look like that image.
- Click Save
5. Setup Main Menu
Access your blog Layout > click Edit link on Main Menu bar and paste this code below in the content area and edit the # with your links and text with whatever you want on your Menu bar.
 <ul class='topmenu1' id='masthead'>

<li><a href='#'>Home</a></li>

<li><a href='#'>Download</a>

<ul>

<li><a href='#'>Premium Version</a></li>

<li><a href='#'>Free Version</a></li>

<li><a href='#'>Downloadable</a></li>

<li><a href='#'>Link Url</a>

<ul>

<li><a href='#'>Example Menu</a>

</li>

<li><a href='#'>Example Menu 1</a></li>

</ul>

</li>

</ul>

</li>

<li><a href='#'>Social</a>

</li>

<li><a href='#'>Features</a>

<ul>

<li class='dir'><a href='#'>Lifestyle</a></li>

<li class='dir'><a href='#'>Sports Group</a>

<ul>

<li><a href='#'>Category 1</a></li>

<li><a href='#'>Category 2</a></li>

<li><a href='#'>Category 3</a></li>

<li><a href='#'>Category 4</a></li>

<li><a href='#'>Category 5</a></li>

</ul>

</li>

<li><a href='#'>Sub Menu 3</a></li>

<li><a href='#'>Sub Menu 4</a></li>

</ul>

</li>

<li><a href='#'>Travel</a></li>

<li><a href='#'>Contact Us</a></li>

</ul>
6. About the author
Access your blog Layout > click Edit link on Sidebar widget

In Configure window, input your Title and in content area just write the following code and replace the image by your image url and text with your author text. And click Save button to finish.
<img src="https://2.bp.blogspot.com/-lOM1c0ykMVw/WfD1_KcphAI/AAAAAAAAHWw/ycXWj-bm8QsEy-RekZ3gc9HcCkhqeFJbwCLcBGAs/s1600/50.jpg"/>
<div class="subtitle">I'm Susanna, I blog about travel.</div>
<br/>
<div class="author-text">This season, the American designer will showcase a series of historic objects from the New York museum's.</div>
8. Instagram on Footer
Access your blog Layout > click Edit link on Footer Instagram widget
1. Go to Blogger Dashboard > Layout > Instagram widget > click on edit button > Edit Html
2. Now copy the below mention code and paste into widget.
<div id='instafeed'/></div>
<script type='text/javascript'>//<![CDATA[
var feed = new Instafeed({
 get: 'user',
 userId: 1553982550,
 limit:8,
 sortBy:'random',
accessToken: '1553982550.1677ed0.c4f6385f8dd740fd83c34ba9fa17e554',
template: '<li><a href="{{link}}" target="_blank"><img src="{{image}}" /><div class="instaover"><div style="display: table; vertical-align: middle; height: 100%; width: 100%;"><span style="display: table-cell; vertical-align: middle; height: 100%; width: 100%;"><i class="fa fa-search"></i></span></div></div></a></li>',
 resolution: 'standard_resolution'
 });
 feed.run();
//]]></script>
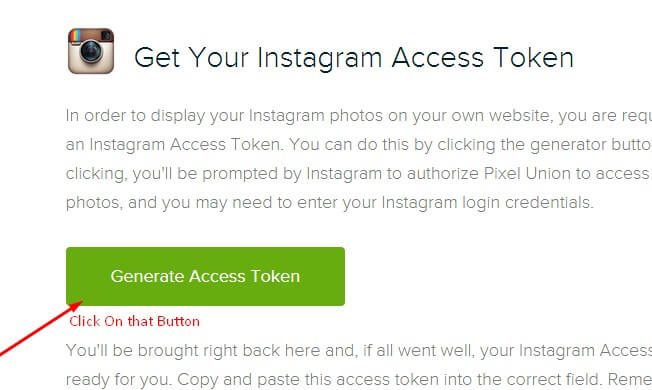
Generate your Instagram Access token by clicking on button from Generate Instagram Access Token
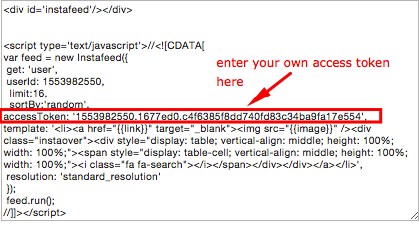
Now enter the access token here in Layout:
ALSO CHANGE THE USERID with yours to show your INSTAGRAM PHOTOS.
9. Blog Main Color Change
Access your blog Template > click Customize as shown in below Image:
Then goto ADVANCED and select any color you want for the whole website.
10. Blog Font Change
Access your blog Template > click Customize as shown in above Image in 9th point:
Then goto ADVANCED and select any color you want for the whole website.
Then change the fonts whatever you like, but if it is a web font then you’ll have to include the font file in the template first in order to make the font work.
11. Sidebar Social Icons
Access your blog Layout > click Edit on the last widget and enter this code:
<div class="social-widget"><div class="social-widget">
 <a class="social-link-twitter" href="#" target="_blank"><span class="fa fa-twitter"></span></a> <a class="social-link-facebook" href="#" target="_blank"><span class="fa fa-facebook"></span></a> <a class="social-link-youtube" href="#" target="_blank"><span class="fa fa-youtube-play"></span></a> <a class="social-link-pinterest" href="#" target="_blank"><span class="fa fa-pinterest"></span></a> <a class="social-link-dropbox" href="#" target="_blank"><span class="fa fa-dropbox"></span></a> </div>
Just change the hyperlink href=”#” to your social media link.
Read more here about the features of the template: Photography Blogger Template
Purchase this template from here: Crusade Blogger Template
Follow my blog with Bloglovin


https://uploads.disquscdn.com/images/e44037369b1824ce83e18e031c28b9ef3e0c1f354330cb8fdc412673d3acb3cb.jpg
como faço para remover READ MORE ?
Remove these lines
Hi! How do I change the background image? Thanks.
Search for this: http://2.bp.blogspot.com/-gpLqNayED3E/We5RZdCYkzI/AAAAAAAAHTU/SMYqoa4ZhvwOVgjyJ18GzeQh0WF4HqnFACK4BGAYYCw/s1600/bg-image.jpg
in the template and replace it with your image url.
Hello.
How can I change the size of photo thumbnails on the top page?
Thank you.
https://uploads.disquscdn.com/images/c0539e2cec58b95c6b3b0e71d516d7b87c9af55cf45c9ccb07d166554def7c51.jpg
Customization is only possible with the premium version. After purchasing the theme please contact us at oddthemes@gmail.com Thanks
How can I change the title and make them appear post?
How can I change the title and make them appear post? https://uploads.disquscdn.com/images/98895d413818b04e0f838ed0d957474028a1edb4697e806fb963b080d8f28b1e.png
You have to add Labels to your posts. So the posts that have the same label gets shown in the You Might Also Like section. It is all automatic.
Is there a way to center the post? I removed the sidebar but when viewed the post are still on the left. Thank you!
Also, I’d like to remove the date and author from each post. I don’t want that. How do I do this?
Please contact us at oddthemes@gmail.com so that we can give you our premium support. Thanks
How to translate this (LOAD MORE POSTS) into Portuguese? https://uploads.disquscdn.com/images/7bb6dbf76f79ab778fd1473b19ac9e1ddd18987aed4baf19988c5e721f6460a7.png
You can do this in the Premium version of the template. In free version our scripts are encrypted hence you can’t edit this. You need to purchase the template for this.
where it? https://uploads.disquscdn.com/images/c6e3e7f3cf36796eb5df0580b80f633df18d3ebc3fa30a2867cc4f22fce30af2.png
Hi, how i can remove the date from thumbnails in home page
Hello! Thank you for your template. I can not remove the background. I can not make the background transparent. I change the colors in the settings, but nothing changes. How to remove the background and leave only the background image? Help me please!
https://uploads.disquscdn.com/images/3b82d68a68602ed05a109d027dd73665559b30dd30dd9b4612344b309e0472ee.png
Hi, how can I change the font and color of header?
Hi
I purchased the premium, yet it’s Garbled in instructions for installation. Also, the Premium file is not able to upload. Please can someone help? Thanks
Hi I purchase the premium.
The Premium is not able to upload and Garbled is shown in the instructions.
Please can someone hlep? Thanks