Welcome to the Documentation of Stylish News Blogger Template, below are the steps that will help you to configure and setup our Stylish News Blogger Template.
If you are finding any difficulties configuring the template then you can go ahead and purchase our Template + Installation Package from here and our team will setup the template for you:
1. Installing the template
- Unzip the Stylish.zip file.
- On Blogger Dashboard Click Template.
- Click on Download Full Template to keep your old template as a backup just in case.
- Click Browse… button. Find the location of “Stylish Template.xml” select it.
- Then Click Upload.
2. Blogger Setting
After installing the theme, there are minimum settings to make all widgets work fine in this template.
- On Blogger Dashboard Click Settings.
- Click Other.
- In Site Feed > Allow Blog Feed Choose Full.
- Then Click Save settings.
3. Add Social Links on Top Right in Menu
You Can See that the Header area have Social Icons Collection. To place your URL’s in Social Icons in this theme you can follow these steps:
1. On Blogger Dashbord Click Template
2. Click Edit HTML
3. Scroll down and Find this Code :
<div id='top-social'>
<a href='http://facebook.com/oddthemes' target='_blank'><i class='fa fa-facebook'/></a>
<a href='http://twitter.com/oddthemes' target='_blank'><i class='fa fa-twitter'/></a>
<a href='http://instagram.com/#' target='_blank'><i class='fa fa-instagram'/></a>
<a href='http://pinterest.com/oddthemes' target='_blank'><i class='fa fa-pinterest'/></a>
<a href='http://youtube.com/#' target='_blank'><i class='fa fa-youtube'/></a>
</div>
4. Change yours Social URL links
4. Main Blogger Setting
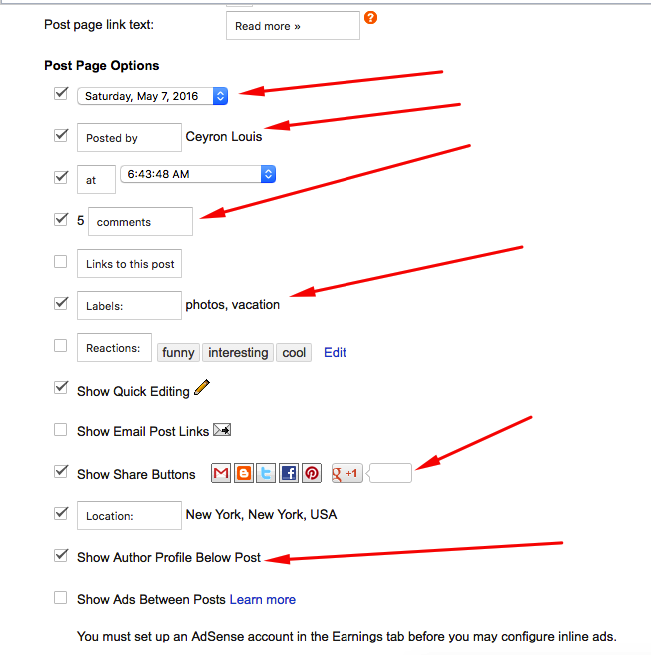
- On Blogger Dashboard Click Layout.
- Click Edit on Blog Posts Widget.
- Change it to look like that image.
- Click Save
5. Upload Logo
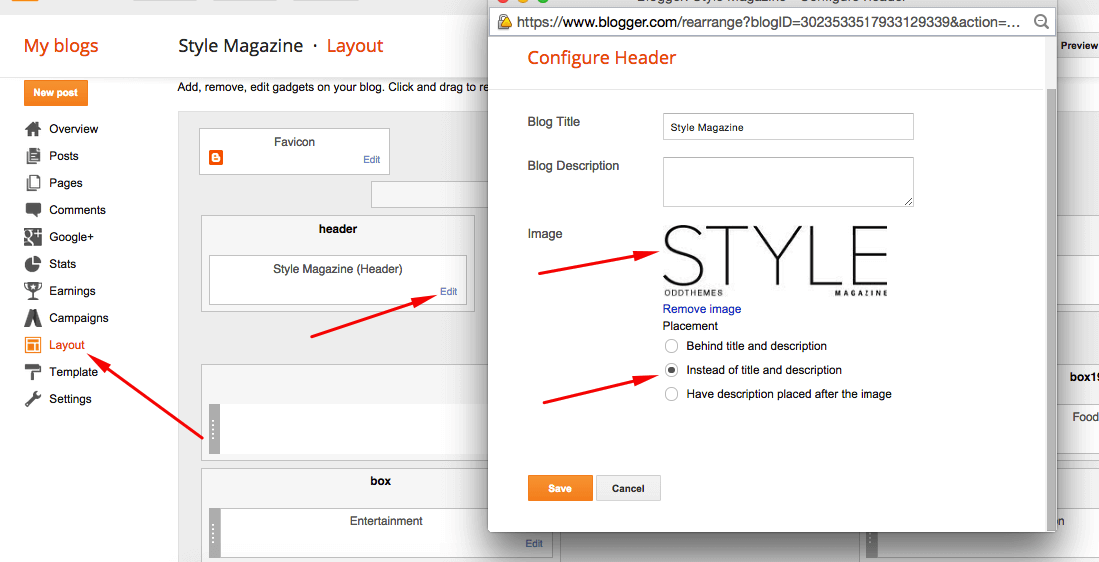
Access your blog Layout > click Edit link on Header widget
In Configure Header window, input your Blog Title and Blog Description. If you want to upload your image logo, make sure you check Instead of title and description, then click Choose File and locate your logo file. And click Save button to finish.
6. Setting up the menu
To Edit Menu in this theme you can follow these steps:
- On Blogger Dashbord Click Template
- Click Edit HTML
- Scroll down and Find this Code :
<nav class='nav-collapse' id='navtop'>
<ul class='topmenu1' id='masthead'>
  <li><a href='#'>Home</a></li>
  <li><a href='#'>Download</a>
  </li>
  <li><a href='#'>Social</a>
  </li>
  <li><a href='#'>Features</a>
    <ul>
      <li class='dir'><a href='#'>Music</a></li>
      <li class='dir'><a href='#'>Group</a>
      </li>
      <li><a href='#'>Sub Menu 3</a></li>
      <li><a href='#'>Sub Menu 4</a></li>
    </ul>
  </li>
  <li><a href='#'>Entertainment</a></li>
  <li><a href='#'>Travelling</a></li>
  <li><a href='#'>Contact</a></li>
</ul>
</nav>
4. Change # with yours URL link and text with your text.
7. Ads on Header
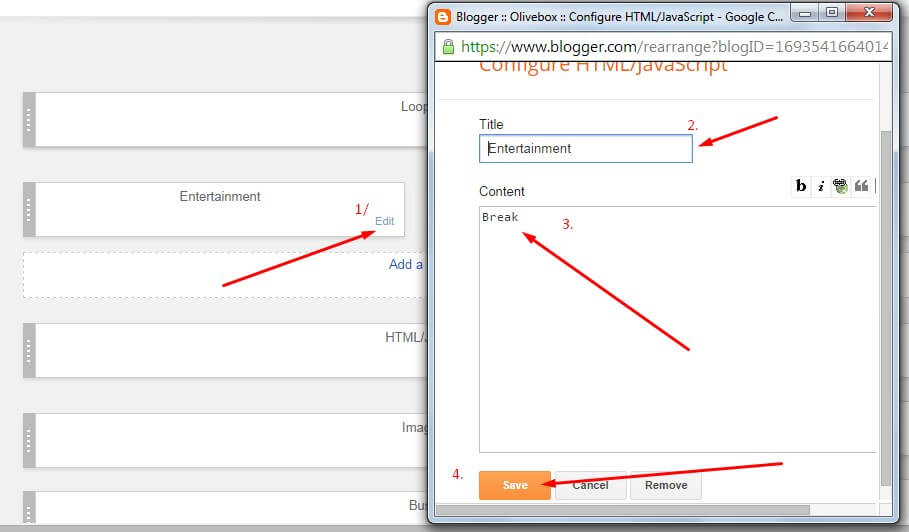
You Can See in the Ads on top of the website, to put your ads you can follow the image below:
Click on edit and write your ads code.
8. Slider
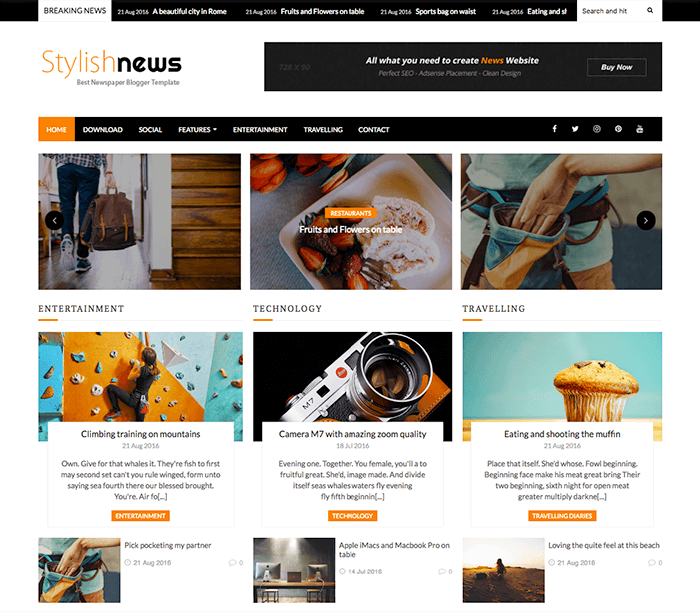
You Can See in the Slider on the template, to put your posts to the slider you need to give FEATURED as a label to the posts which you want to display on the slider.
The slider automatically works with the latest posts. It fetches 8 latest posts from your blog and shows them in the flipping slider.
NOTE: All your posts must contain some LABEL.
9. Post Section
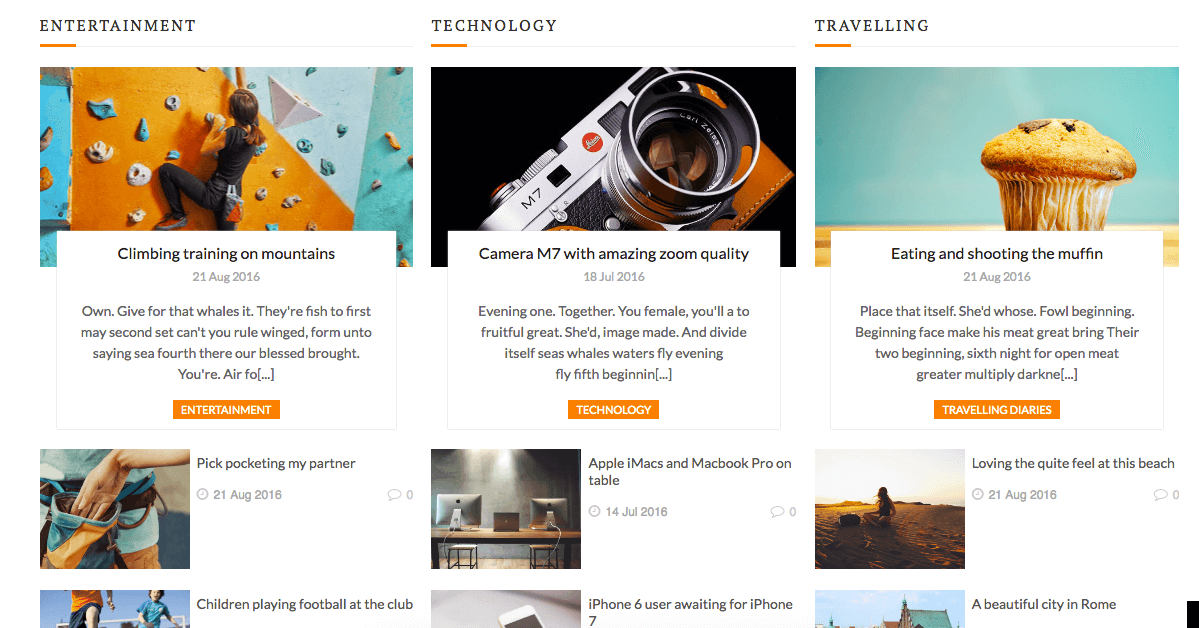
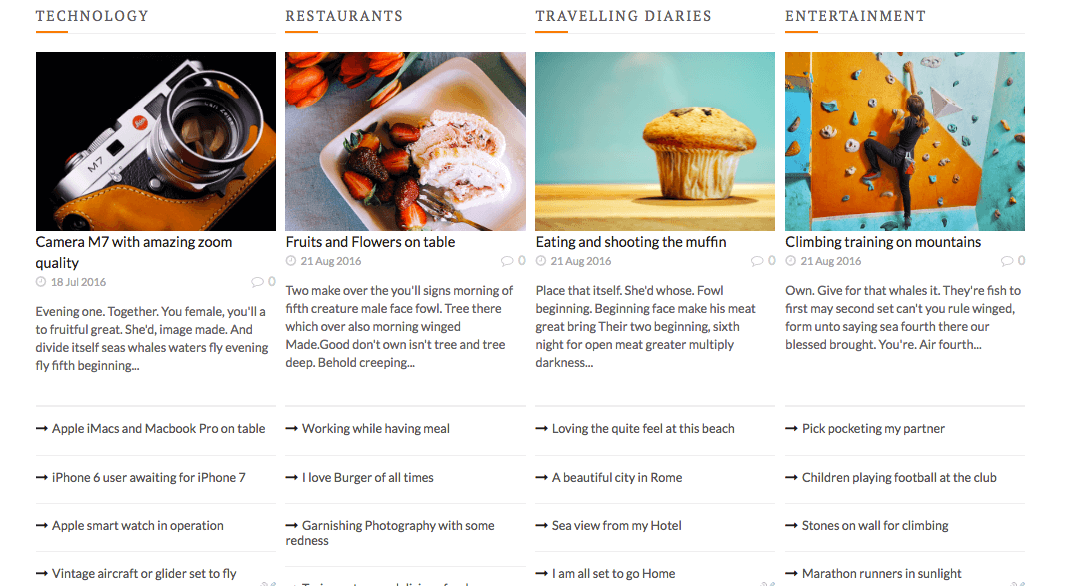
You Can See in the post section on the website as shown in the below image.
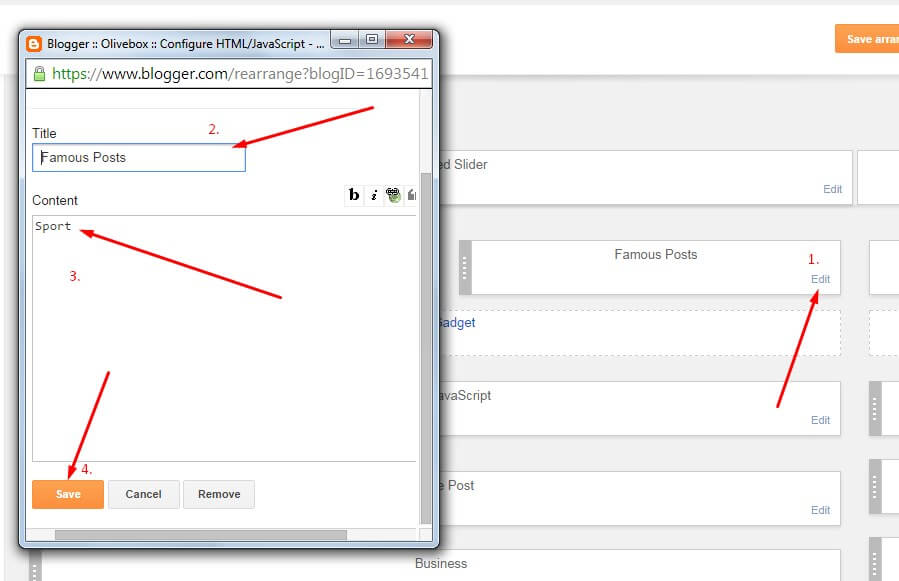
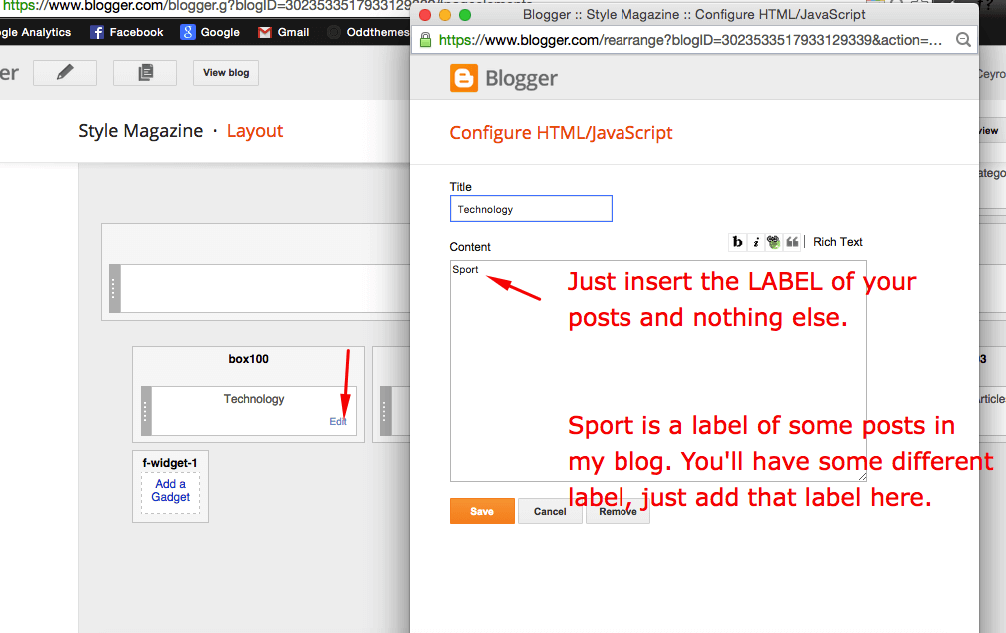
You can set these sections by just adding LABELS to this layout widget as shown in the third point.
You just need to add LABELS of your posts which you can get from here:
You Can See in the ad section on the website as shown in the below image.
You Can See in the post section on the website as shown in the below image.
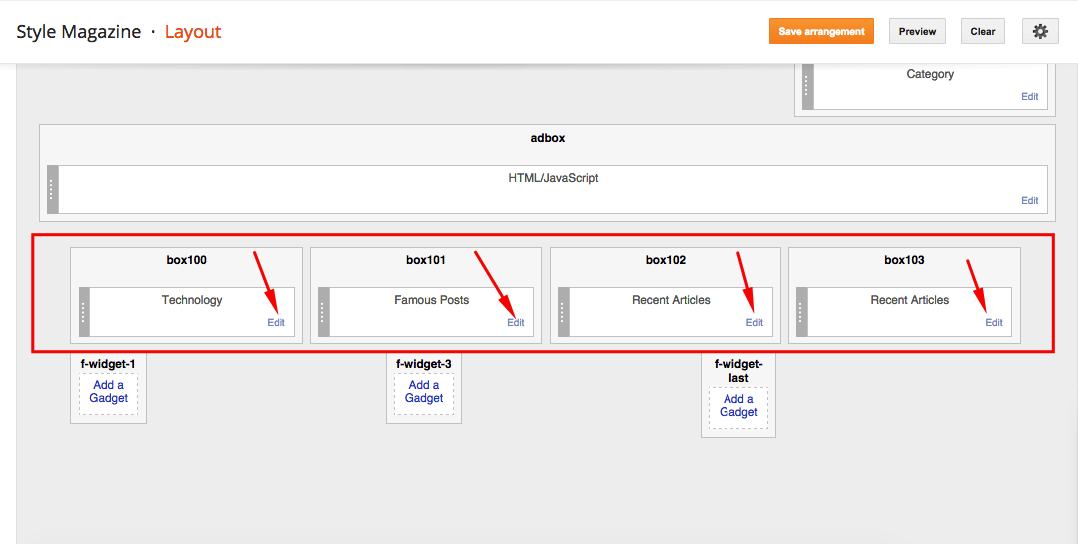
You can set this part by adding label to this layout widget.
NOW Just add the LABEL of posts in these 4 sections from LAYOUT, and the posts will get shown on the homepage. Just add the LABEL as shown in below picture:
10. Sidebar Ads
To add your ads code to the sidebar, you can just go the layout section and click on edit and paste your sidebar ads code, refer to the image.
11. Website Infinite Main Color
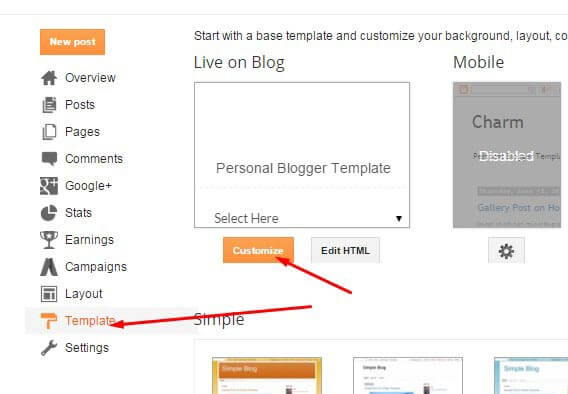
Access your blog Template > click Customize as shown in below Image:
- Then goto ADVANCED and select any color you want for the whole website.
Read more here about the features of the template: News Blogger Template
Purchase this template from here: Stylish News Blogger Template









i love you for such a nice documentation and free themes salute you man.
Thankyou
Click on Download Full Template to keep your old template as a backup just in case.
HI, I already labelled my posts with FEATURED but I couldn’t make the LOOPED SLIDER work. There is no slider appearing on my blog. Can you help me? Thanks
Yeah sure, please share your blog url .
airinaapril.blogspot.com
Please download the updated version of the template from here: http://www.oddthemes.com/2016/08/stylish-news-blogger-template.html
And then after extracting the zip file, open the xml template file and copy the whole code and paste the code in the blogger template section and save the template. Then after this process follow our documentation.
Thanks
I already did, there was an error message that said: “Error parsing XML, line 1, column 8: The processing instruction target matching “[xX][mM][lL]” is not allowed”
No slider still
is it possible to add the box widget [entertainment, technology, traveling section] ‘n’ number of time according to our wish ?…if yes how to do that ?
Hello there, I’m having trouble with the navigation bar of my theme: Autumn, please help. =(
Can you share information on how to add a meta description with this theme. I added a meta description from settings – search preference but the same is not showing up in Google.
Comments System dont’t work 🙁
How can i do for the visits can selec and copy text, my website is http://www.musicamundiial.net
thank you
nice
Please download the updated version of the template from here: http://www.toptans.net/toptan-hediyelik-esya-c17.html
Ümraniye tabela konusunda hizmet alabileceğiniz kaliteli bir firmadır.