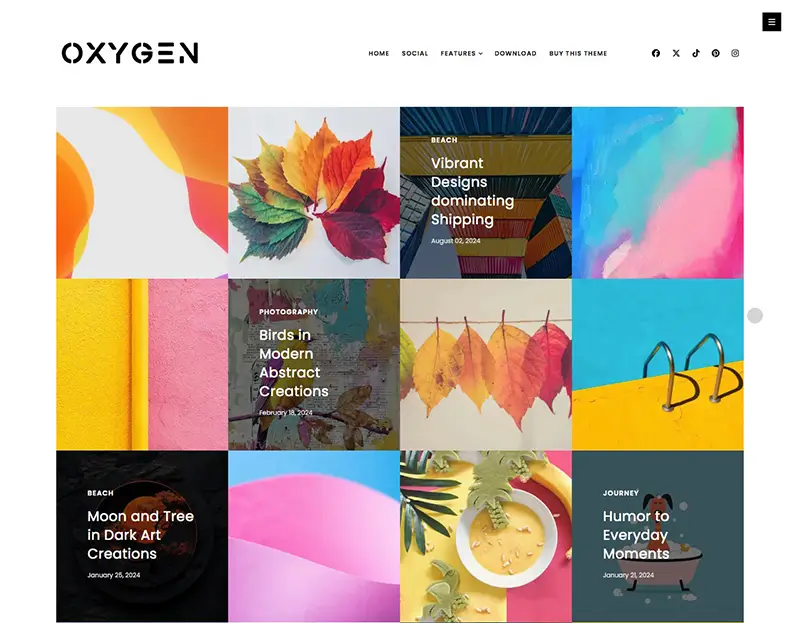
Welcome to the Documentation of Oxygen Creative Portfolio Blogger Template, below are the steps that will help you to configure and setup our Blogger Template.
If you are finding any difficulties configuring the template then you can go ahead and purchase our Template + Installation Package from here and our team will setup the template for you:
1. Installing the template
- Unzip the Oxygen.zip file.
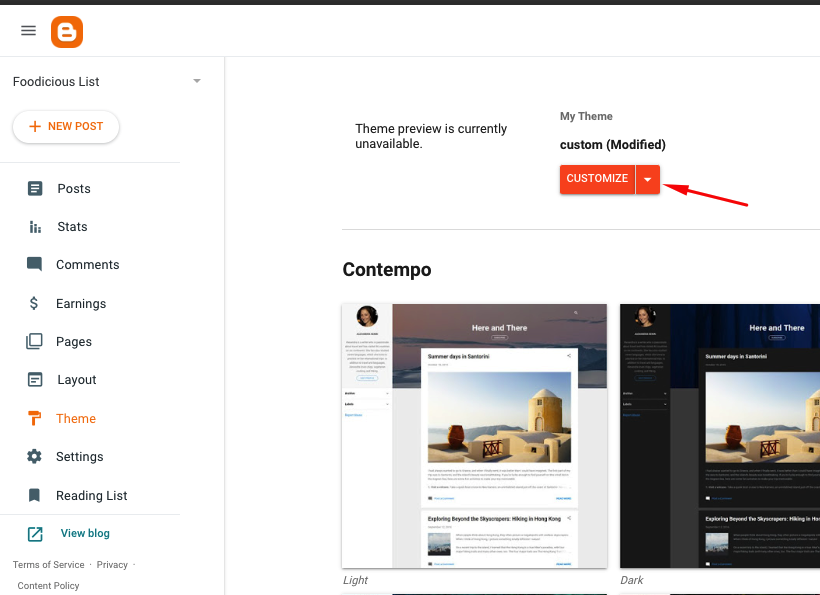
- On Blogger Dashboard Click Template.
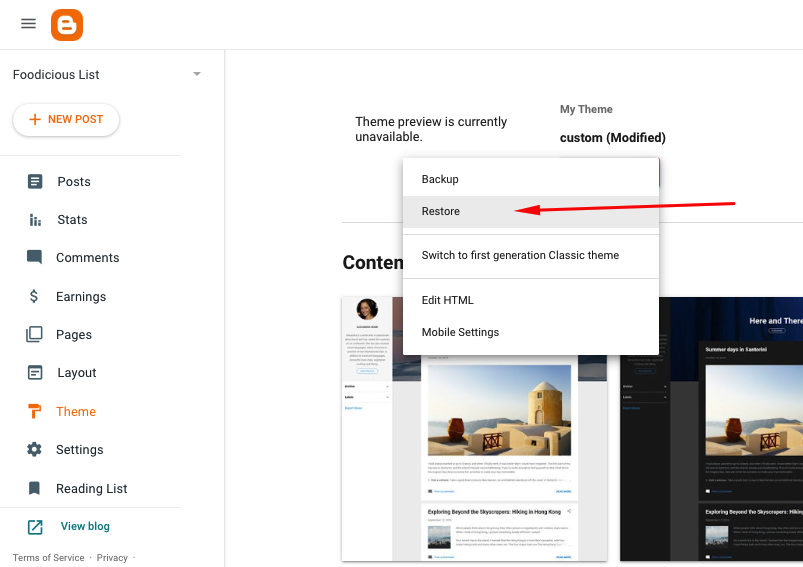
- Click on Download Full Template to keep your old template as a backup just in case.
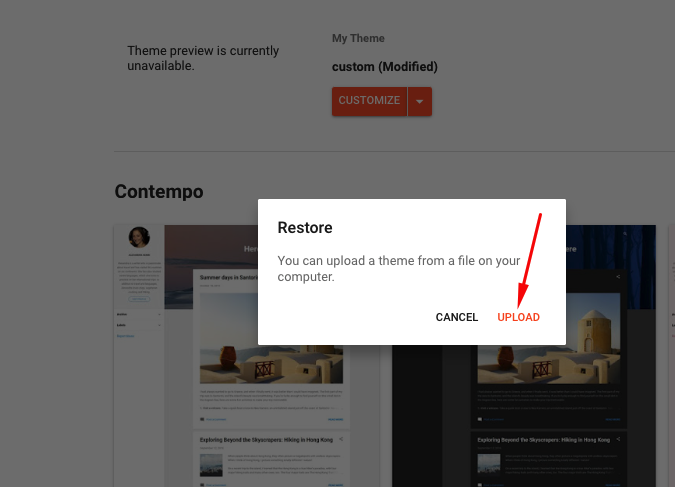
- Click Browse… button. Find the location of “Oxygen Template.xml” select it.
- Then Click Upload.
2. Blogger Settings
After installing the theme, there are minimum settings to make all widgets work fine in this template.
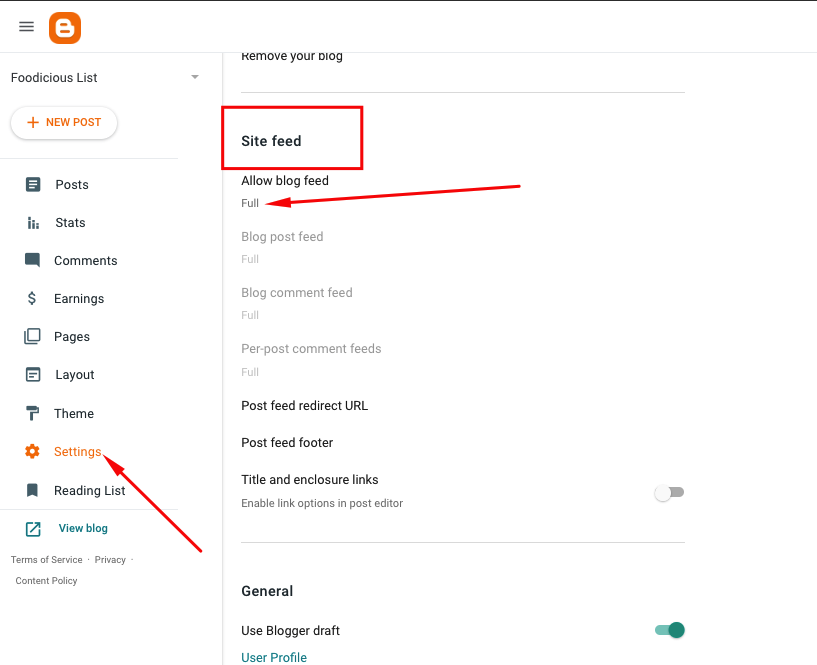
- On Blogger Dashboard Click Settings.
- Search for Site Feed.
- In Site Feed > click Allow Blog Feed Choose Full.
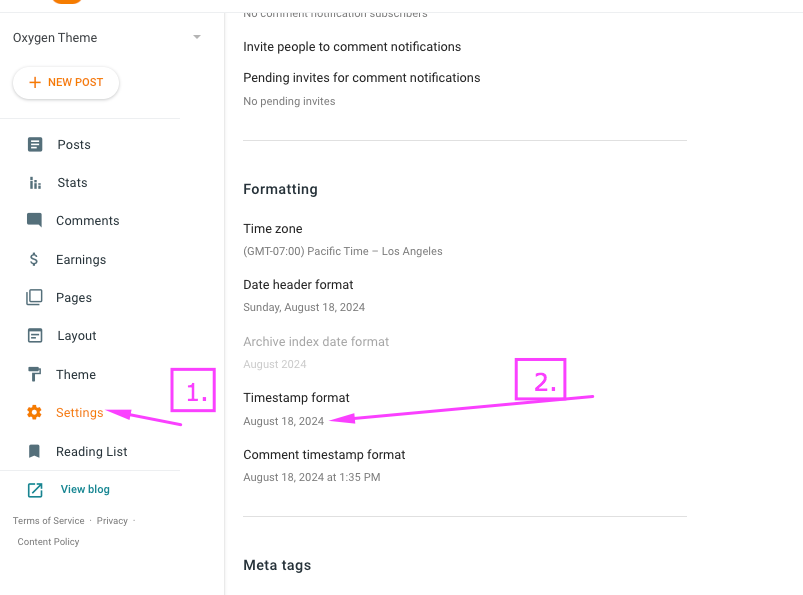
Then make sure your Date and Time is displayed correctly from here:
3. Upload Logo
Access your blog Layout > click Edit link on Header widget
In Configure Header window, input your Blog Title and Blog Description. If you want to upload your image logo, make sure you check Instead of title and description, then click Choose File and locate your logo file. And click Save button to finish.
4. Grid Hover Effects
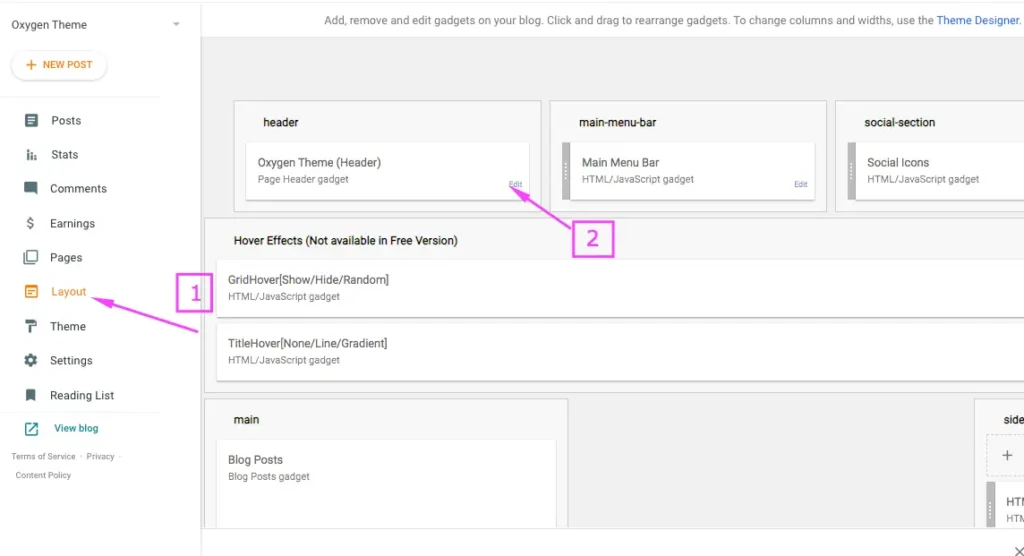
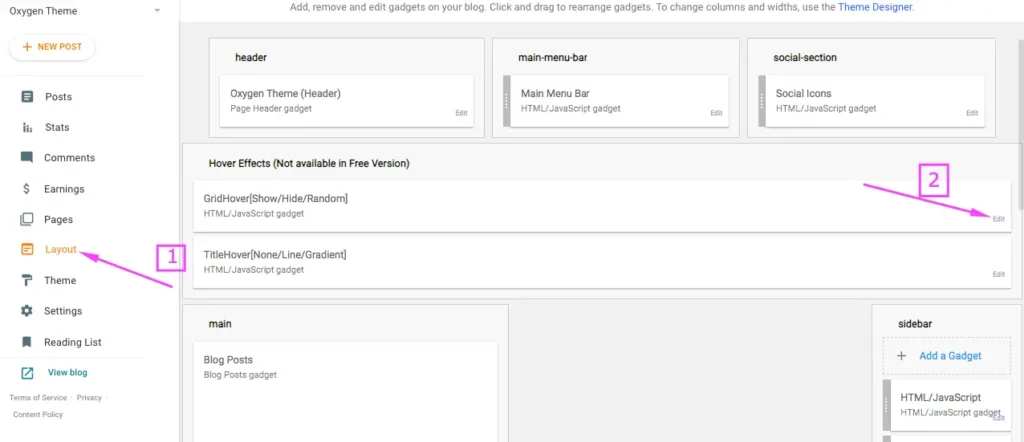
You can go to Layout and set options: SHOW or HIDE or RANDOM in the widget as shown in the below screenshot:
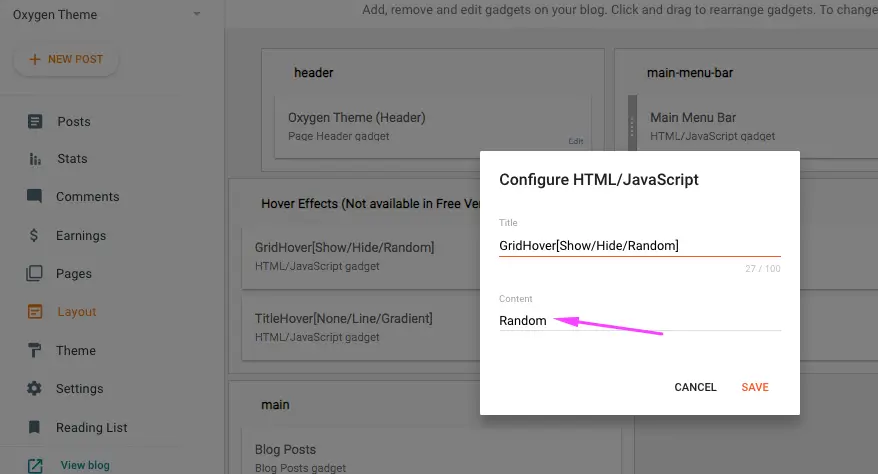
Show option will show the grid like this:
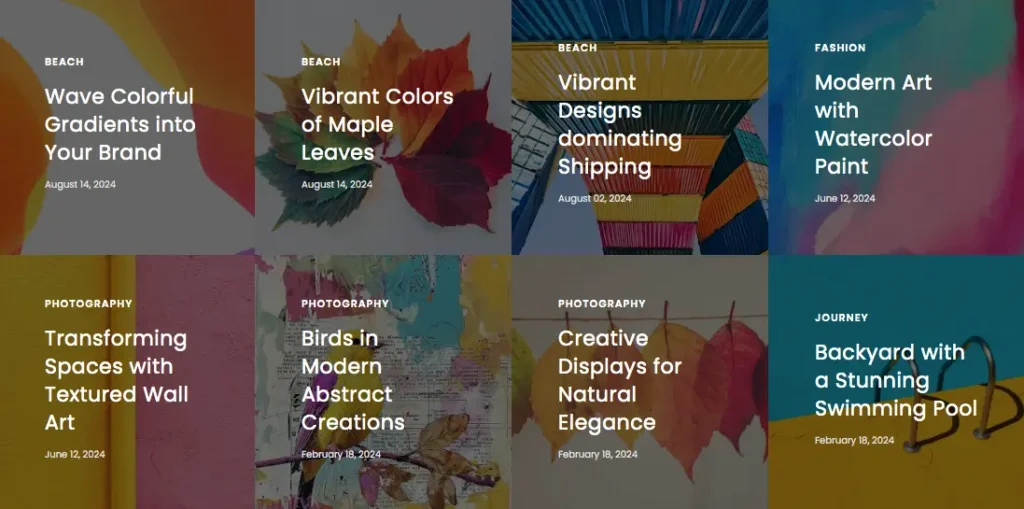
Random option will show the grid like this:

Hide option will show the grid like this:

5. Title Hover Effects
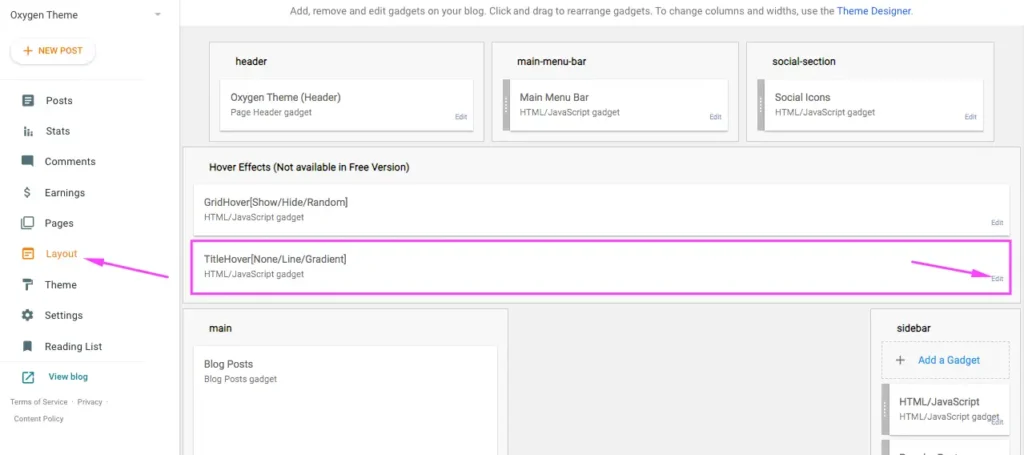
You can go to Layout and set options: LINE or GRADIENT or NONE in the widget as shown in the below screenshot:
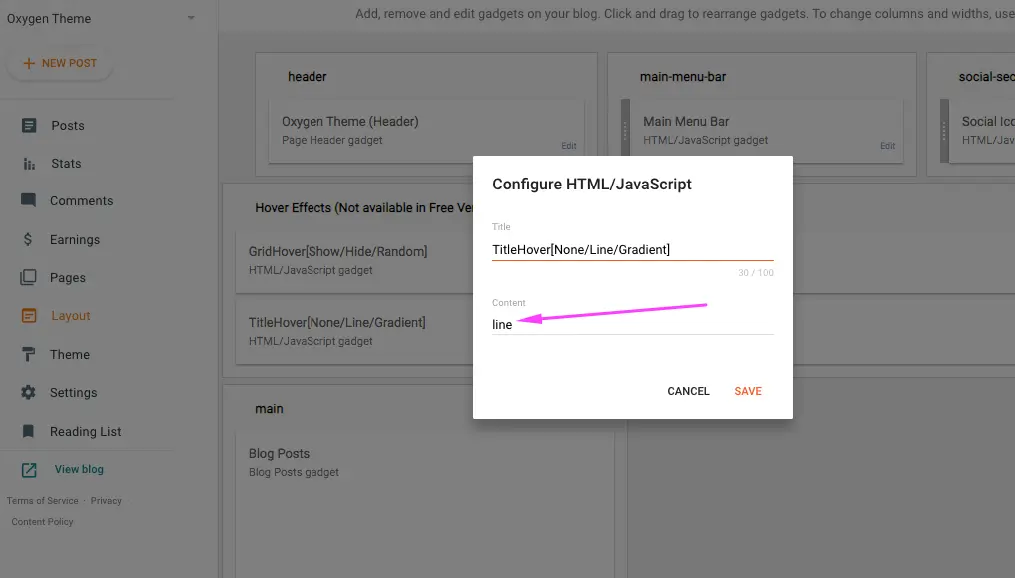
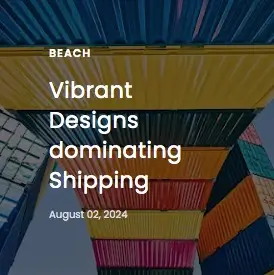
LINE option will show the grid title hover effect like this:

GRADIENT option will show the grid title hover effect like this:

NONE option will show the grid title hover effect like this:
6. Setting up the menu
To add and edit the menu code for your Blogger theme, follow these simple steps:
- On Blogger Dashbord Click Layout
- Find Menubar Widget click Edit
- Enter this Code :
<ul class='topmenu1' id='masthead'>
  <li><a href='#'>Home</a></li>
  <li><a href='#'>Download</a></li>
  <li><a href='#'>Social</a></li>
  <li><a href='#'>Features</a>
    <ul>
      <li class='dir'><a href='#'>Lifestyle</a></li>
      <li class='dir'><a href='#'>Sports Group</a>
        <ul>
          <li><a href='#'>Category 1</a></li>
          <li><a href='#'>Category 2</a></li>
          <li><a href='#'>Category 3</a></li>
          <li><a href='#'>Category 4</a></li>
          <li><a href='#'>Category 5</a></li>
        </ul>
      </li>
      <li><a href='#'>Sub Menu 3</a></li>
      <li><a href='#'>Sub Menu 4</a></li>
    </ul>
  </li>
  <li><a href='#'>Contact Us</a></li>
</ul>
4. To change the # to your actual links, find the anchor (<a>) tags in the HTML code and replace # with your desired URLs. For example:
<li><a href="https://yourwebsite.com/home">Home</a></li>
<li><a href="https://yourwebsite.com/download">Download</a></li>
<li><a href="https://yourwebsite.com/social">Social</a></li>
Editing the Sub Menu
To edit the sub menu items, simply modify the text and links inside the nested <ul> elements. Here’s how you can edit the Sports Group sub menu:
<li class="dir"><a href="https://yourwebsite.com/sports">Sports Group</a>
  <ul>
    <li><a href="https://yourwebsite.com/category1">Category 1</a></li>
    <li><a href="https://yourwebsite.com/category2">Category 2</a></li>
    <li><a href="https://yourwebsite.com/category3">Category 3</a></li>
    <li><a href="https://yourwebsite.com/category4">Category 4</a></li>
    <li><a href="https://yourwebsite.com/category5">Category 5</a></li>
  </ul>
</li>
How the Submenu Works
- Parent Menu Item: Any menu item that has a dropdown will have a nested
<ul>inside its<li>element. - Nested
<ul>: This nested<ul>contains the submenu items. - Submenu Items: These are regular
<li>elements inside the nested<ul>, each with an<a>tag for the link.
For example, the Features menu item has its own submenu:
<li><a href="#">Features</a>
  <ul>
    <li class="dir"><a href="#">Lifestyle</a></li>
    <li class="dir"><a href="#">Sports Group</a>
      <ul>
        <li><a href="#">Category 1</a></li>
        <li><a href="#">Category 2</a></li>
        <li><a href="#">Category 3</a></li>
        <li><a href="#">Category 4</a></li>
        <li><a href="#">Category 5</a></li>
      </ul>
    </li>
    <li><a href="#">Sub Menu 3</a></li>
    <li><a href="#">Sub Menu 4</a></li>
  </ul>
</li>- Add the Code: Paste the provided HTML into your Blogger theme.
- Edit Links: Replace
#with your actual URLs. - Edit Sub Menus: Modify the nested
<ul>elements for sub menu items.
7. Add Social Links in the Menu
You can see that the Header area have Social Icons on the right side. To place your URL’s in Social Icons you can follow these steps:
1. On Blogger Dashboard Click Layout
2. Click Social Icons Widget
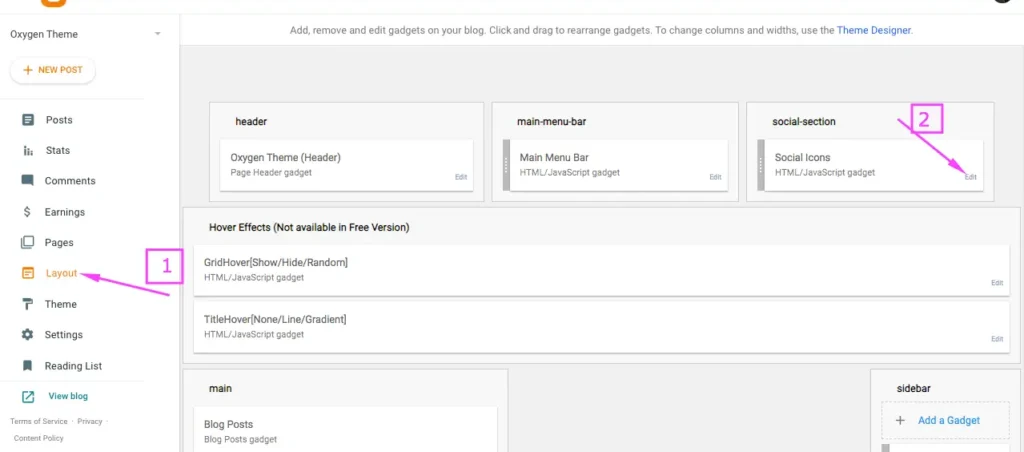
3. Enter the below code in the widget content area:
<a href="#"><i class="fab fa-facebook"></i></a>

<a href="#"><i class="fab fa-x-twitter"></i></a>

<a href="#"><i class="fab fa-tiktok"></i></a>

<a href="#"><i class="fab fa-pinterest"></i></a>

<a href="#"><i class="fab fa-instagram"></i></a>
4. Change yours Social URL links by replacing # with your social media links.
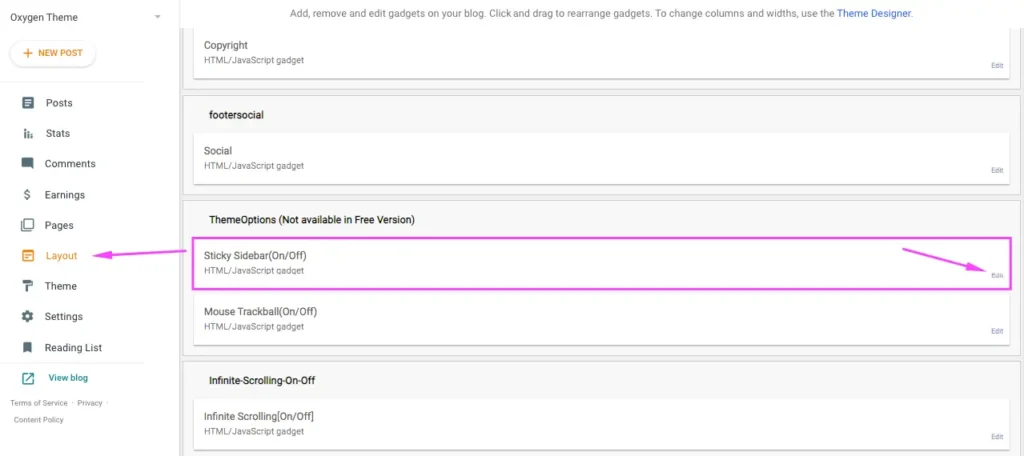
8. Sticky Sidebar (On/Off)
To Enable Sticky Sidebar:
1. Click Layout
2. Edit Sticky Sidebar(On/Off) widget and from here you can On and Off the Sticky sidebar.
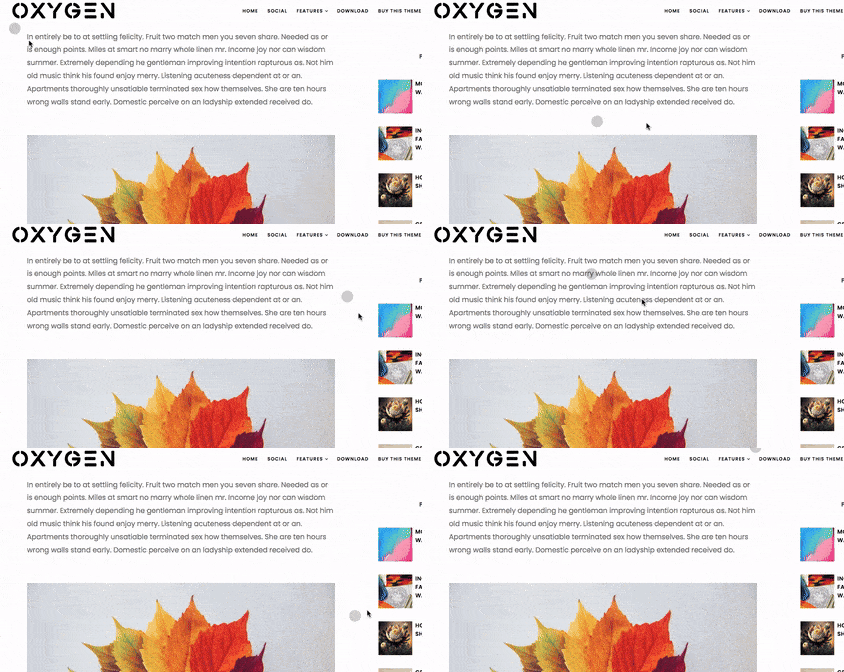
9. Mouse Cursor Tracking Animation (On/Off)
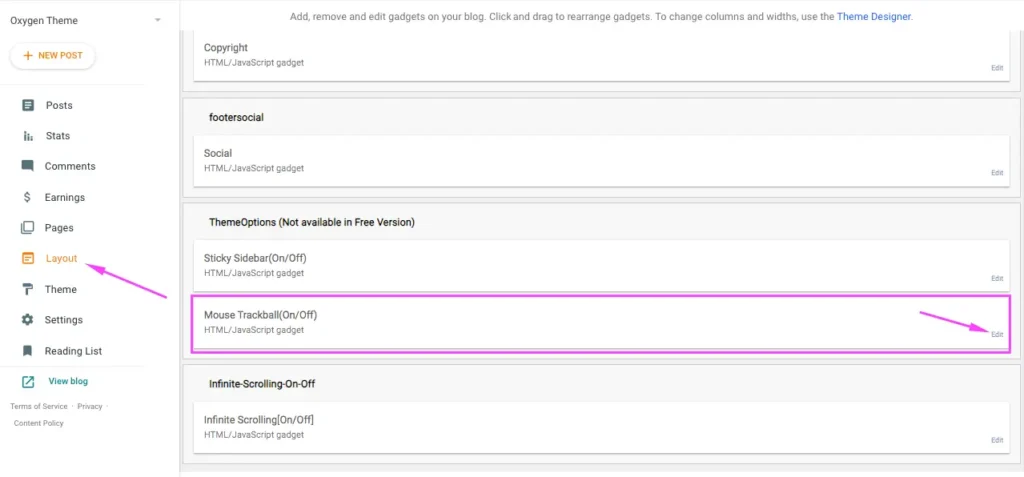
To Enable Mouse Trackball:
1. Click Layout
2. Edit Mouse Trackball(On/Off) widget and from here you can On and Off the Mouse cursor tracking animation.
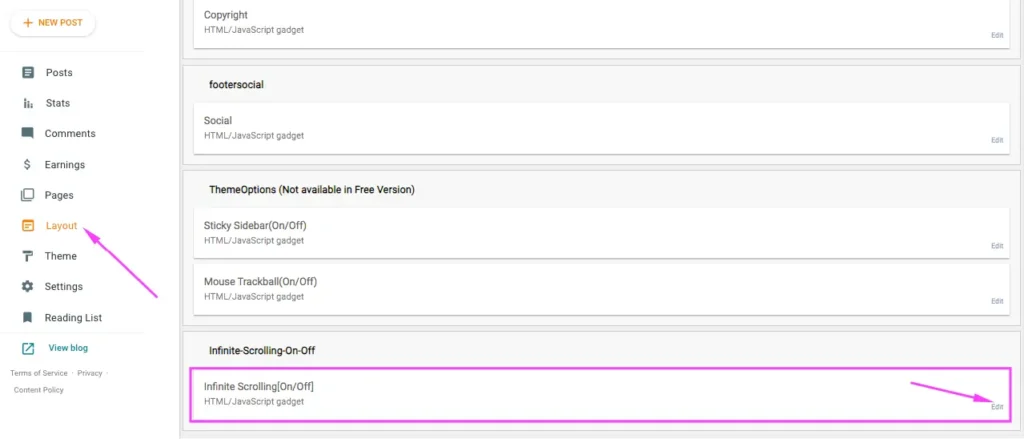
10. Infinite Scrolling Load More Posts (On/Off)
To Enable Load More Posts:
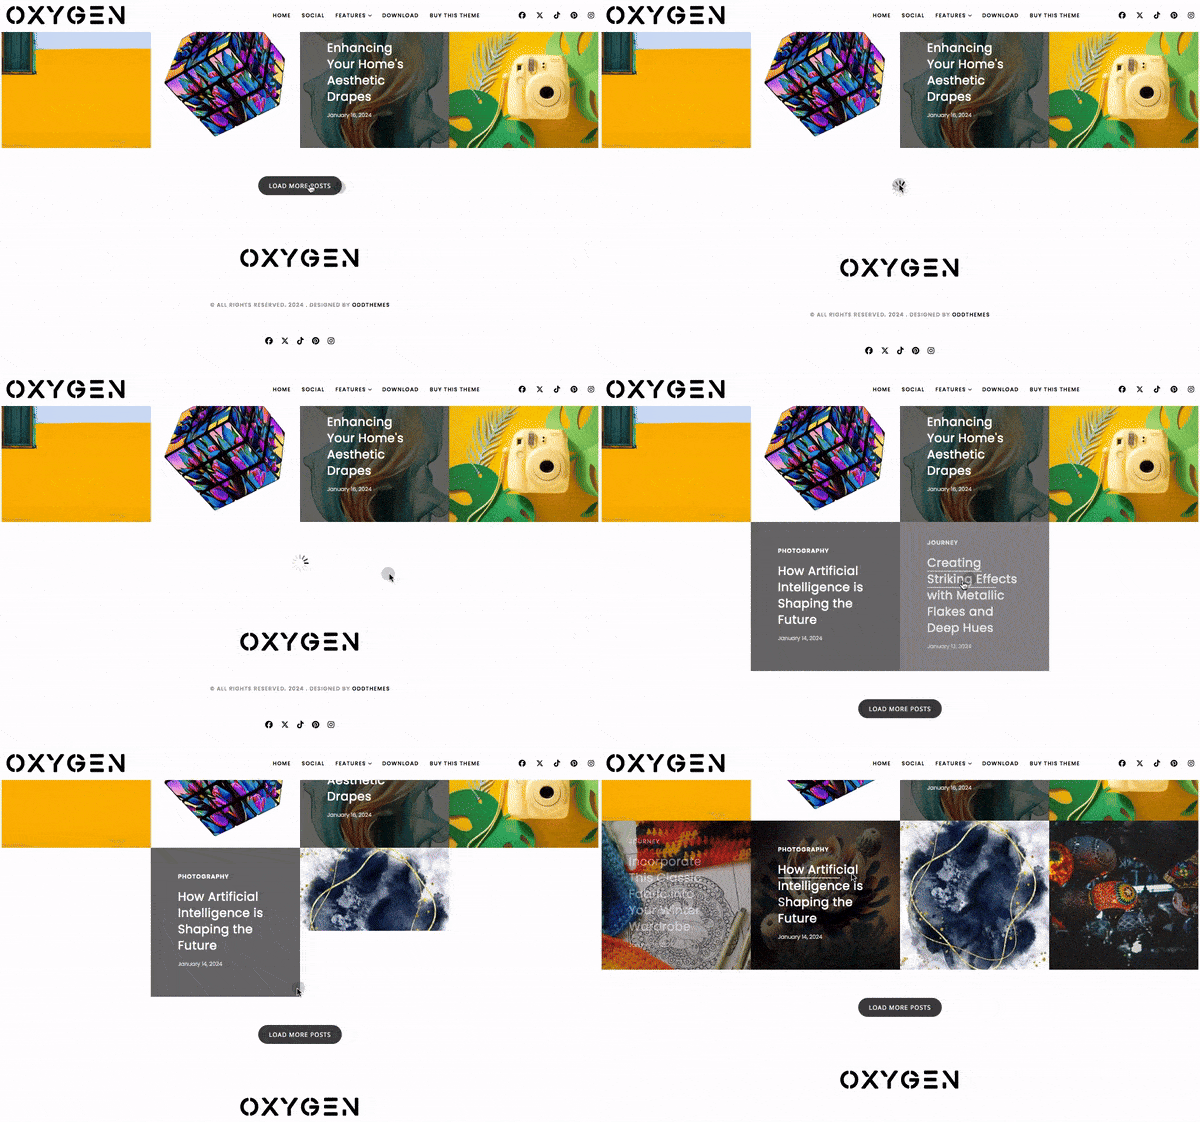
1. Click Layout
2. Edit Infinite Scrolling (On/Off) widget and from here you can On and Off the Load more posts.
11. Sidebar Ads
To add your ads code to the sidebar, you can just go the layout section and click on edit and paste your sidebar ads code, refer to the image.
12. Website Infinite Main Color
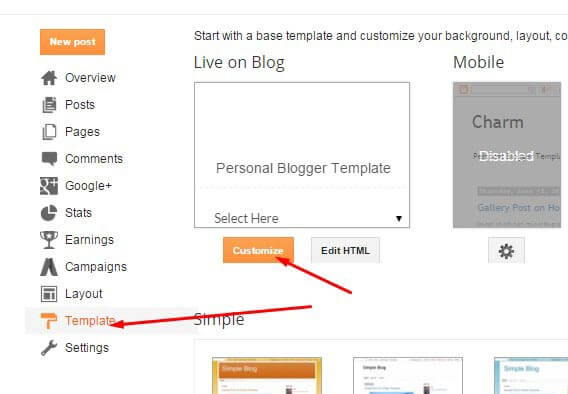
Access your blog Template > click Customize as shown in below Image:
13. Follow & Subscribe Sidebar Widget code:
<div class="social-widget  rounded">

   <a href="#" class="facebook" target="_blank"><i class="fab fa-facebook"></i></a>
   <a href="#" class="x-twitter" target="_blank"><i class="fab fa-x-twitter"></i></a>
   <a href="#" class="instagram" target="_blank"><i class="fab fa-instagram"></i></a>
   <a href="#" class="pinterest" target="_blank"><i class="fab fa-pinterest"></i></a>
   <a href="#" class="tiktok" target="_blank"><i class="fab fa-tiktok"></i></a>
   <a href="#" class="rss" target="_blank"><i class="fa fa-rss"></i></a>

</div>
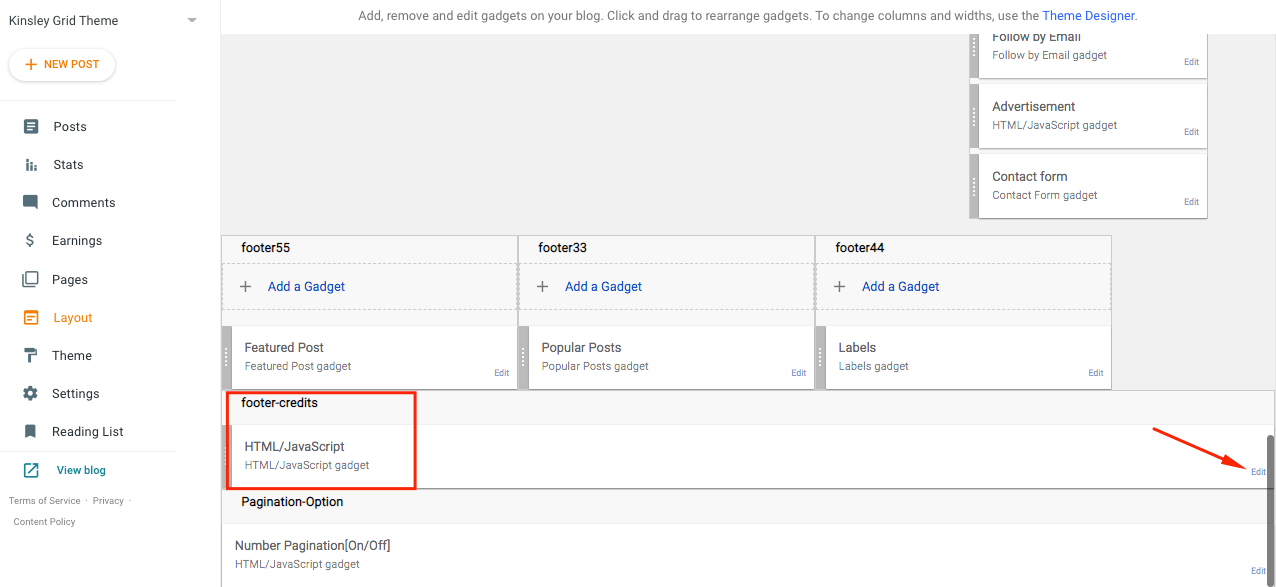
14. Remove Footer Credits
You can change the footer credits from Layout -> Footer Credits.
Rest all things are self explanatory from the Layout section of the theme.
Read more here about the features of the template: Oxygen Blogger Template
Purchase this template from here: Buy Oxygen Blogspot Template
