Are you still using one of the default Blogger templates? If yes, it might be time to upgrade to a premium Blogger template to give your blog a professional, modern, and highly customizable look. This tutorial will give you step by step process for migration to a more advanced blogger theme.
You’ll learn how to safely migrate from a default Blogger template to a premium one without losing your content.
Benefits of Switching to a Premium Blogger Template
- Modern, mobile-first design
- SEO-optimized code
- Professional layouts (grid, magazine, portfolio, etc.)
- Enhanced widgets (featured posts, Instagram feed, etc.)
- Fast loading and clean structure
- Priority support and updates
What You’ll Need
- Your current Blogger.com blog
- A premium Blogger template ZIP file (e.g., from OddThemes.com)
Step 1: Backup Your Current Blogger Theme
Always create a backup before making changes.
- Go to Blogger Dashboard → Theme
- Click the arrow beside the “Customize” button
- Select Backup
- Click Download and save the
.xmlfile on your computer
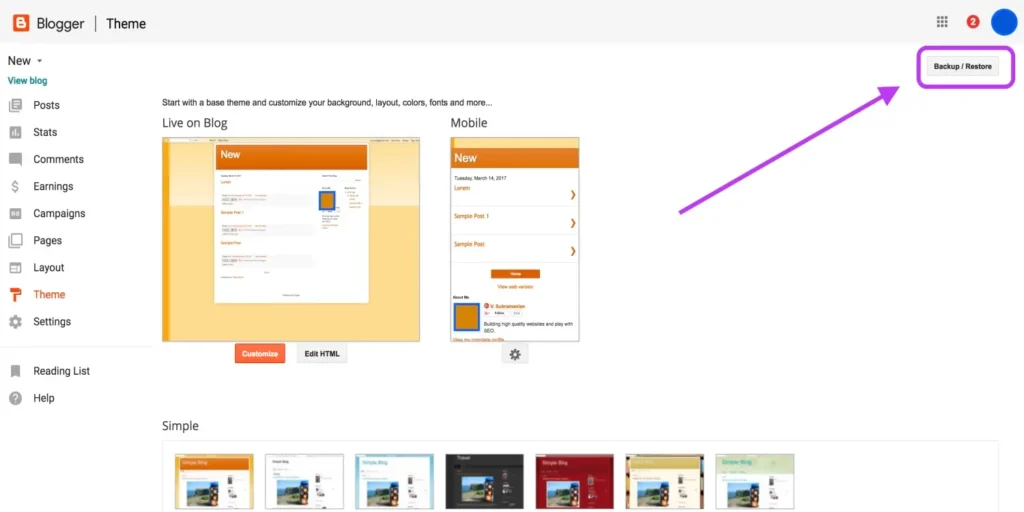
💾 This step ensures you can revert if something goes wrong.
Step 2: Remove Third-Party Gadgets (Optional)
To avoid layout conflicts:
- Go to Layout
- Remove third-party or unnecessary gadgets (ads, widgets)
- Note the ones you want to re-add later
This step is optional but helpful for a clean transition.
Step 3: Upload the Premium Template
- Unzip the template file you downloaded from OddThemes
- Inside the folder, locate the main template file — typically named something like:
TemplateName.xml - Go to Blogger → Theme
- Click the arrow next to the Customize button → Restore
- Choose the
.xmlfile and upload
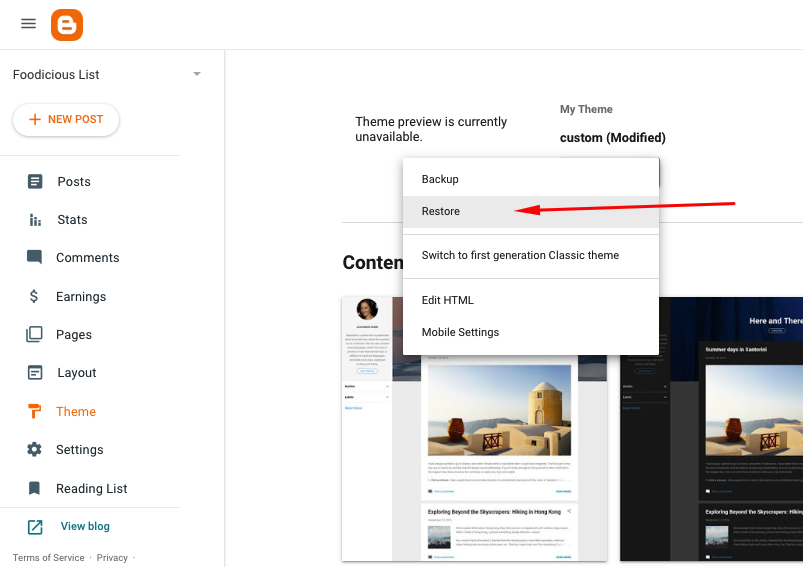
⚠️ After upload, your blog may look completely different — don’t worry, your posts, pages, and comments are intact.
Step 4: Configure the Layout
- Go to Layout
- Start editing gadgets and widgets as per your new template:
- Header Logo
- Navigation Menu
- Featured Post Area
- Sidebar Widgets
- Footer Credits
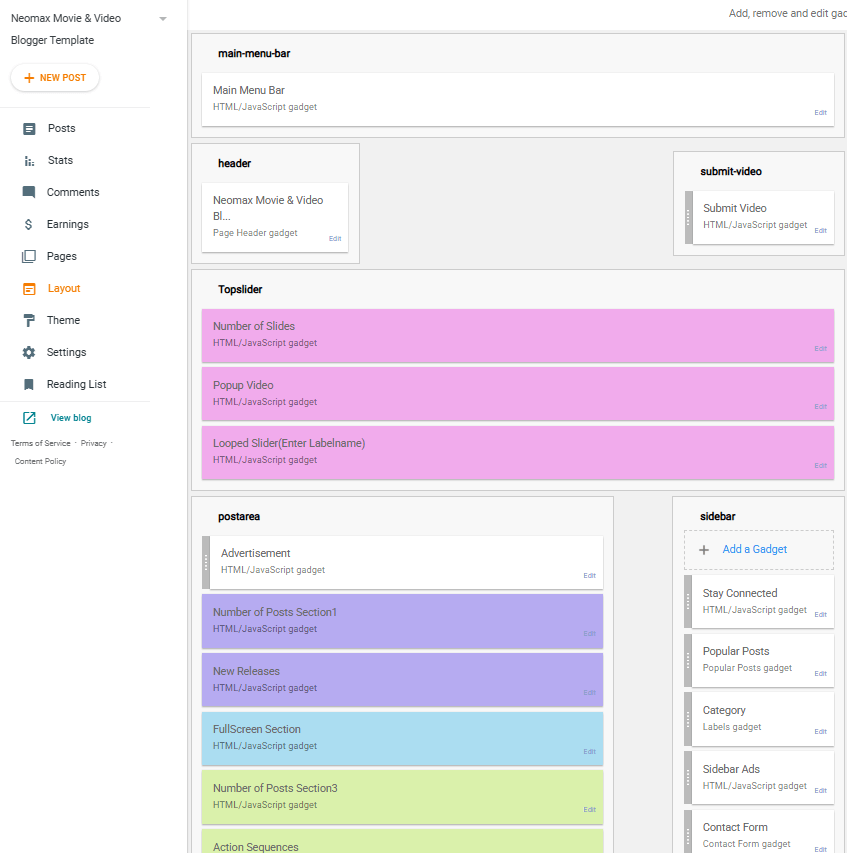
Premium templates from OddThemes come with widget instructions in the documentation folder. Follow that to understand how to:
- Set up the featured post section
- Add recent posts in grid view
- Create dropdown menus
- Add your Instagram widget or social media icons
- and so on.
Step 5: Customize Colors, Fonts & Logo
Use Theme → Customize to update:
- Fonts and colors
- Background images
- Site title & description
- Mobile preview
Alternatively, you can add custom CSS under Theme → Customize → Advanced → Add CSS.
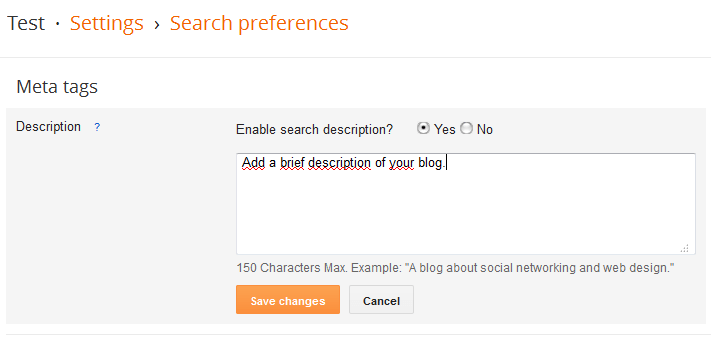
Step 6: Optimize for SEO
Don’t forget to re-enable your SEO settings:
- Go to Settings → Meta Tags and enable custom descriptions
- Add a custom 404 page using a new Page
- Submit your new design to Google Search Console again (optional, but recommended)
Step 7: Restore or Re-add Gadgets
Now that your layout is active:
- Re-add your previously used gadgets if needed
- Use new ones provided by the premium template (like image sliders, featured categories)
Step 8: Test Your Blog
Check your blog on:
- Desktop browsers
- Mobile phones
- Tablet view
Ensure the menu, posts, sidebars, and footers are showing as expected.
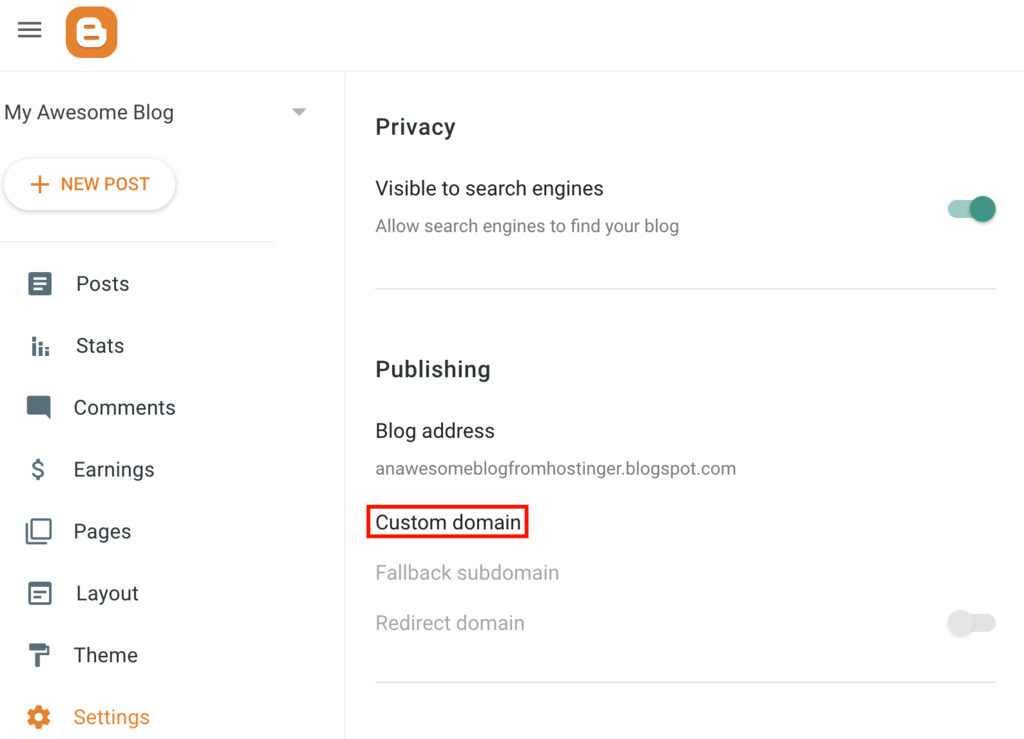
Optional: Add Custom Domain or SSL
If you haven’t already:
- Add a custom domain name under Settings
- Enable HTTPS for secure access
You’re Done!
You’ve now successfully migrated from a default Blogger template to a beautiful premium template from OddThemes!
Pro Tips
- Always backup before installing another template
- Read the documentation PDF that comes with your template
- Contact OddThemes support if widgets don’t appear correctly
- Don’t forget to re-add Google Analytics and Search Console
- Premium templates from OddThemes offer better design, SEO structure, mobile responsiveness, and features like sticky menus, grid layouts, and custom widgets — all with easy-to-use layout editors.
Need Help?
If you run into issues, contact OddThemes Support and share:
- Your blog URL
- Your template name
- A short description of the issue