Welcome to the Documentation of Autumn Blogger Template, below are the steps that will help you to configure and setup our Autumn Blogger Template.
If you are finding any difficulties configuring the template then you can go ahead and purchase our Template + Installation Package from here and our team will setup the template for you:
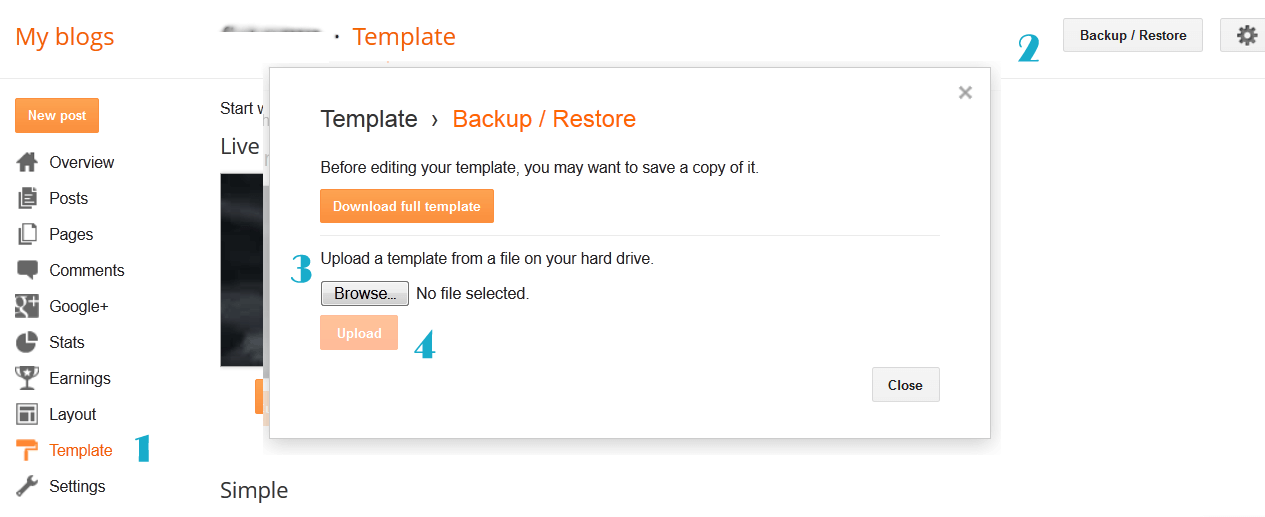
1. Installing the template
- Unzip the Autumn.zip file.
- On Blogger Dashboard Click Template.
- Click on Download Full Template to keep your old template as a backup just in case.
- Click Browse… button. Find the location of “Autumn Template.xml” select it.
- Then Click Upload.

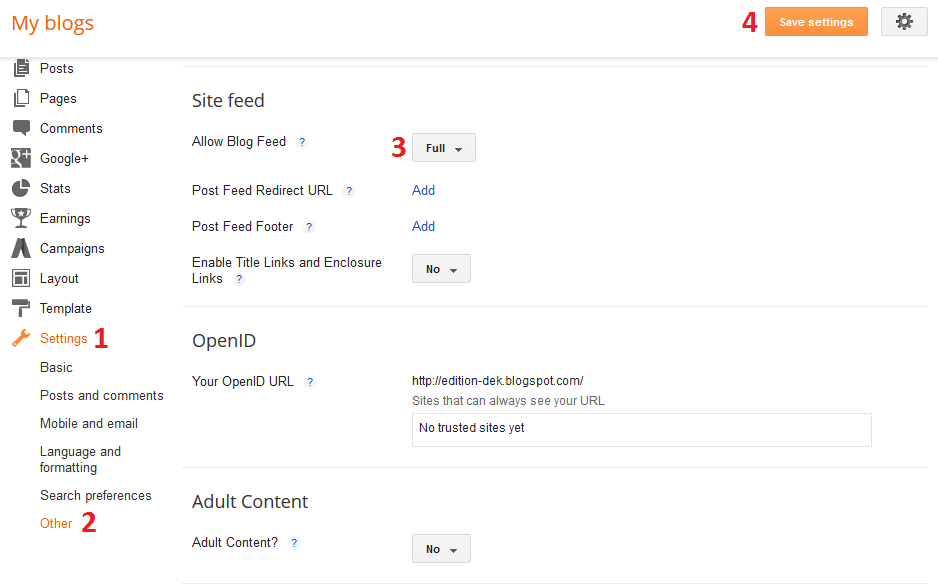
2. Blogger Setting
After installing the theme, there are minimum settings to make all widgets work fine in this template.
- On Blogger Dashboard Click Settings.
- Click Other.
- In Site Feed > Allow Blog Feed Choose Full.
- Then Click Save settings.
3. Social Setting
This is optional setting but we would recommend it to enable these features in your blog, to make it more social friendly.
|
1
2
3
4
5
|
<meta content='<enter your username>’ name=’twitter:site’/>
<meta content='<enter your name>’ name=’twitter:creator’/> <meta content='<enter your site url>’ name=’twitter:domain’/> |
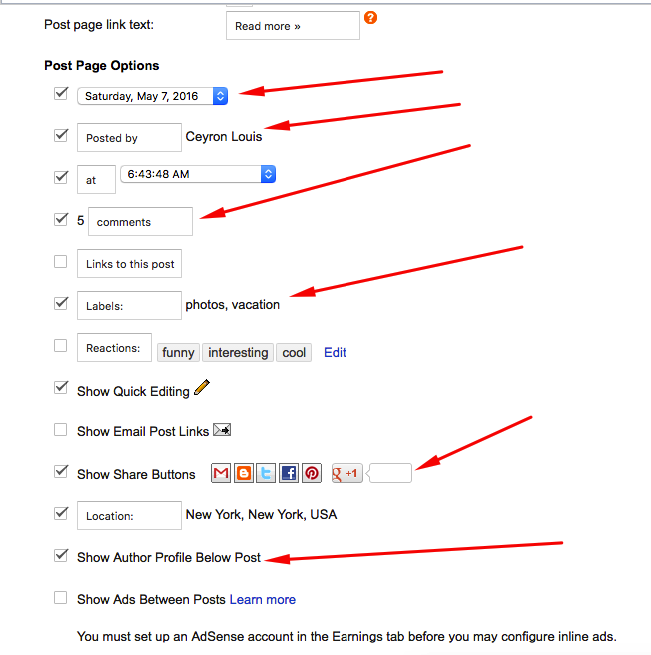
4. Main Blogger Setting
- On Blogger Dashboard Click Layout.
- Click Edit on Blog Posts Widget.
- Change it to look like that image.
- Click Save
5. Setup Main Menu
Goto blogger Edit Template section and search for the below code and edit it according to your needs:
 <ul class='topmenu1' id='masthead'>

<li><a href='#'>Home</a></li>

<li><a href='#'>Download</a>

<ul>

<li><a href='#'>Premium Version</a></li>

<li><a href='#'>Free Version</a></li>

<li><a href='#'>Downloadable</a></li>

<li><a href='#'>Link Url</a>

<ul>

<li><a href='#'>Example Menu</a>

</li>

<li><a href='#'>Example Menu 1</a></li>

</ul>

</li>

</ul>

</li>

<li><a href='#'>Social</a>

</li>

<li><a href='#'>Features</a>

<ul>

<li class='dir'><a href='#'>Lifestyle</a></li>

<li class='dir'><a href='#'>Sports Group</a>

<ul>

<li><a href='#'>Category 1</a></li>

<li><a href='#'>Category 2</a></li>

<li><a href='#'>Category 3</a></li>

<li><a href='#'>Category 4</a></li>

<li><a href='#'>Category 5</a></li>

</ul>

</li>

<li><a href='#'>Sub Menu 3</a></li>

<li><a href='#'>Sub Menu 4</a></li>

</ul>

</li>

<li><a href='#'>Travel</a></li>

<li><a href='#'>Contact Us</a></li>

</ul>
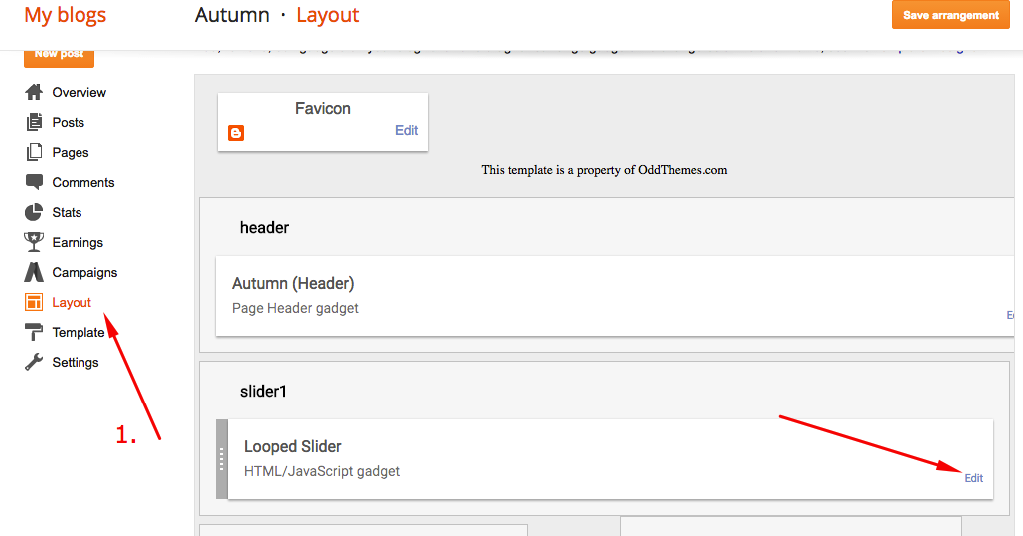
6. Slider
Access your blog Layout > click Edit link on Looped Slider widget
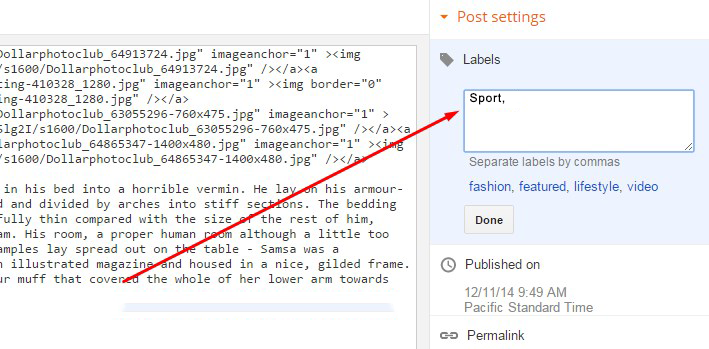
You can enter the Label of the posts in the content area so that the posts of that Label gets to be shown in the Slider.
Now enter single label as shown in the below image. Make sure you have entered the label correctly as Labels are case-sensitive.
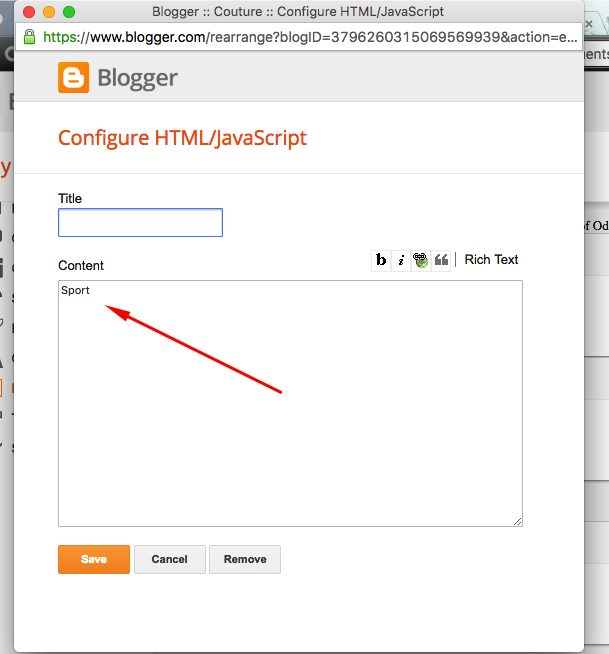
Enter the label that you’ve used in the posts as shown below:
7. About the author
Access your blog Layout > click Edit link on Sidebar widget

In Configure window, input your Title and in content area just write the following code and replace the image by your image url and text with your author text. And click Save button to finish.
<span class="author-img">
<img src="https://2.bp.blogspot.com/-btdAmdgxS1o/V54I8qNKMhI/AAAAAAAAECo/REWYbOqxdmMf2X4h6HcDD1ZcvxfwudkNgCLcB/s1600/Cutest-cat-ever.jpg"/>
</span>
<div class="author-text"><h3>PHOTOGRAPHER & BLOGGER</h3>Full time web designer, dedicated to work, friendly in nature. Get in touch with the email id's mentioned. ;)</div>

<div class="social-share">
<a class="author-social" href="#" target="_blank"><i class="fa fa-facebook"></i></a> <a class="author-social" href="#" target="_blank"><i class="fa fa-twitter"></i></a> <a class="author-social" href="#" target="_blank"><i class="fa fa-instagram"></i></a> <a class="author-social" href="#" target="_blank"><i class="fa fa-pinterest"></i></a> <a class="author-social" href="#" target="_blank"><i class="fa fa-heart"></i></a> </div>
8. Instagram on Footer
Access your blog Layout > click Edit link on Footer Instagram widget
1. Go to Blogger Dashboard > Layout > Instagram widget > click on edit button > Edit Html
2. Now copy the below mention code and paste into widget.
<div id='instafeed'/></div>
<script type='text/javascript'>//<![CDATA[
var feed = new Instafeed({
 get: 'user',
 userId: 1553982550,
 limit:6,
 sortBy:'random',
accessToken: '1553982550.1677ed0.c4f6385f8dd740fd83c34ba9fa17e554',
template: '<li><a href="{{link}}" target="_blank"><img src="{{image}}" /><div class="instaover"><div style="display: table; vertical-align: middle; height: 100%; width: 100%;"><span style="display: table-cell; vertical-align: middle; height: 100%; width: 100%;"><i class="fa fa-search"></i></span></div></div></a></li>',
 resolution: 'standard_resolution'
 });
 feed.run();
//]]></script>
Generate your Instagram Access token by clicking on button from Generate Instagram Access Token


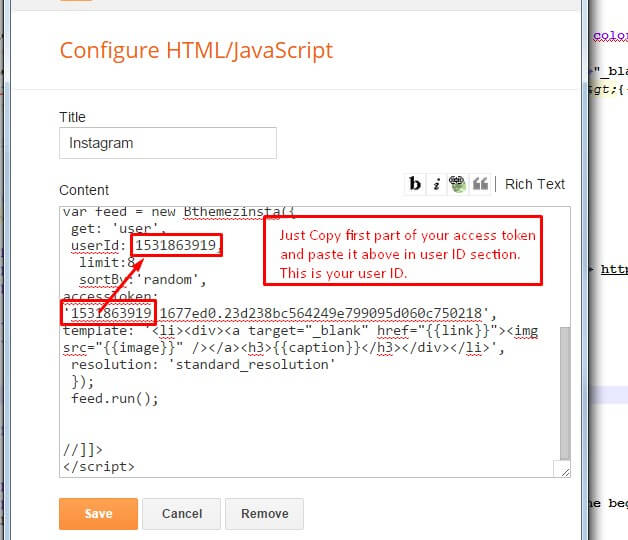
Now enter the access token here in Layout:

ALSO CHANGE THE USERID with yours to show your INSTAGRAM PHOTOS.
9. Blog Main Color Change
Access your blog Template > click Customize as shown in below Image:
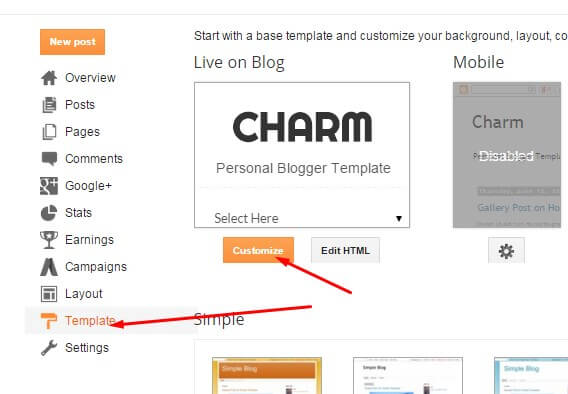
Then goto ADVANCED and select any color you want for the whole website.
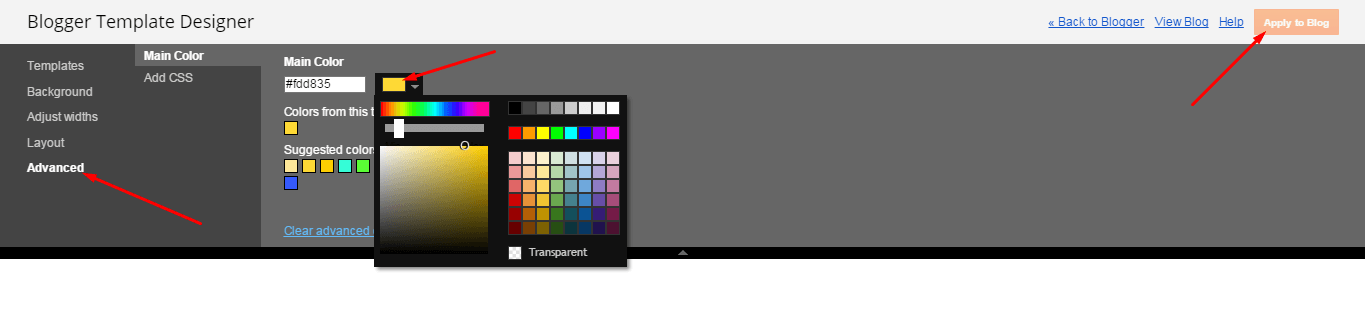
10. Blog Font Change
Access your blog Template > click Customize as shown in above Image in 9th point:
Then goto ADVANCED and select any color you want for the whole website.
Then change the fonts whatever you like, but if it is a web font then you’ll have to include the font file in the template first in order to make the font work.
11. Footer Social Icons
Access your blog Layout > click Edit on the last widget and enter this code:
<li><a href='#' target='_blank'><i class='fa fa-twitter'/></i></a></li>
<li><a href='#' target='_blank'><i class='fa fa-google-plus'/></i></a></li>
<li><a href='#' target='_blank'><i class='fa fa-facebook'/></i></a></li>
<li><a href='#' target='_blank'><i class='fa fa-pinterest'/></i></a></li>
<li><a href='#' target='_blank'><i class='fa fa-instagram'/></i></a></li>
<li><a href='#' target='_blank'><i class='fa fa-youtube-play'/></i></a></li>
Just change the hyperlink href=”#” to your social media link.
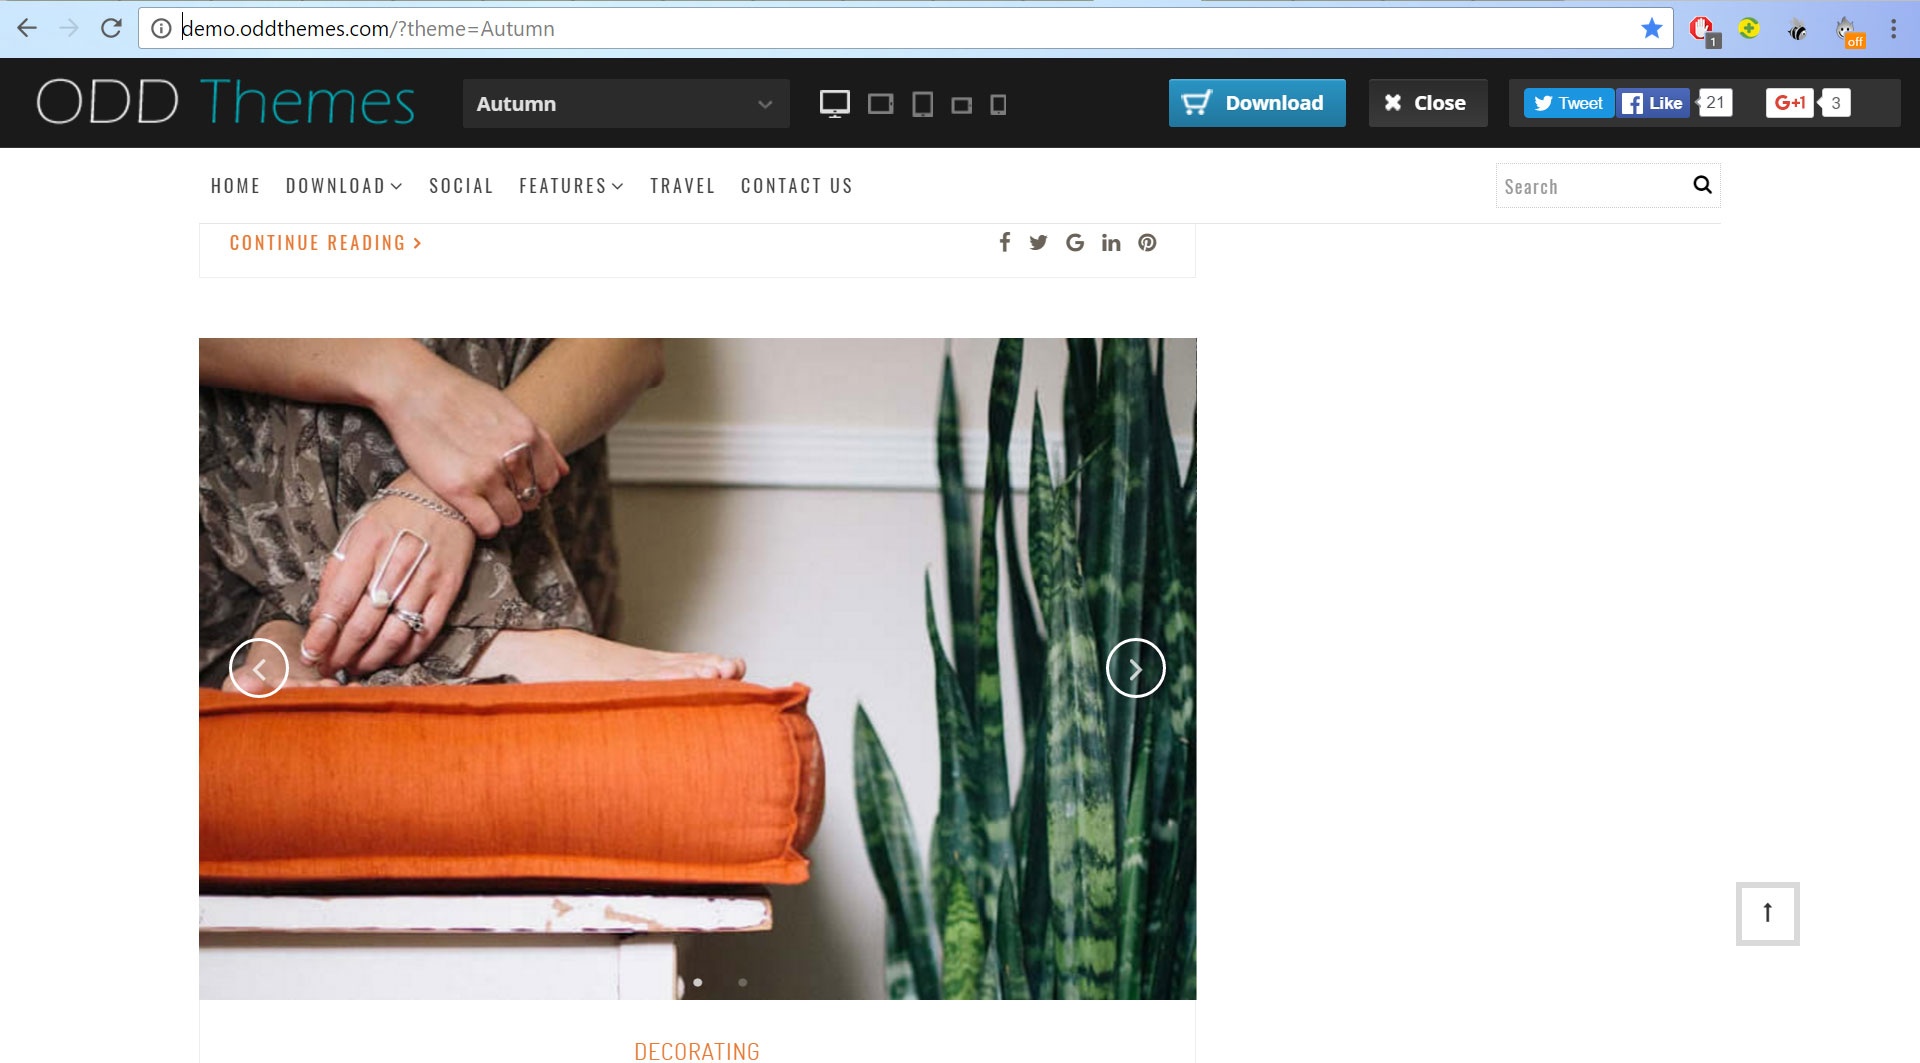
Read more here about the features of the template: Blogger Template
Purchase this template from here: Autumn Blogger Template
Follow my blog with Bloglovin
Leave a Reply to Xeph Hipolito Cancel reply
You must be logged in to post a comment.